Types of roles available on your knorish site, plus discover how to add, manage, and delete users for specific roles like Accounting or Customer Service.
At Knorish, we recognize the significance of role-based access for efficiently managing your academy. As your business expands, adding more users for tasks like course creation, site management, analytics tracking, customer service, and accounting becomes essential. We offer diverse roles to meet your business requirements.
Note: This feature is available on Professional and Power plans. Professional plans offer 5 additional users and Power plan users get access to add upto 50 additional users.
To access this feature, upgrade your account or reach out to us for support on this request: Contact Knorish Support

Covered in this FAQ
- Overview
- Types of roles in Identity & Access Management
- Adding Users and Assigning Specific Roles
Available under the Identity and Access section on your site, there are several role-based options available on Knorish. In this article, we show you which roles are available as part of this feature and how these roles can be enabled on Professional and Power plans for Publishers and Enterprise accounts.
Overview
Your academy can have one primary owner. Based on your plan and needs, you can add co-admins and multiple users with specific rights to enhance site management.
Type Of Roles & Access
Besides the primary owner and a co-admin, rights for each user can be given from all or any of the roles. You can choose to give select rights from each of the sections listed in Identity & Access Management or select all the options as the need may be. Below is a detailed list of types of roles and rights possible:
| Type Of Role | Access Type |
| Primary Owner/ Admin | Owner. Master access to all functionalities on the platform. |
| Co-admin | Same as owner. Has master access to all functionalities on the platform. |
| Instructor |
An instructor has the ability to create, update, and manage courses that are either created by them or assigned to them. Instructors also have the ability to make updates to any settings that are related to the course or its associated pages. They can also publish or unpublish courses if they have been granted additional permissions. Instructors do not have the ability to design the landing page or thank you page that are linked to the course. Currently, there is no specific role for bundles. |
| Editor | Has the ability to create, update, publish, or unpublish pages that are either created by the user or assigned to them. |
| Blog Posts Manager | Rights to manage, create and update blog posts. |
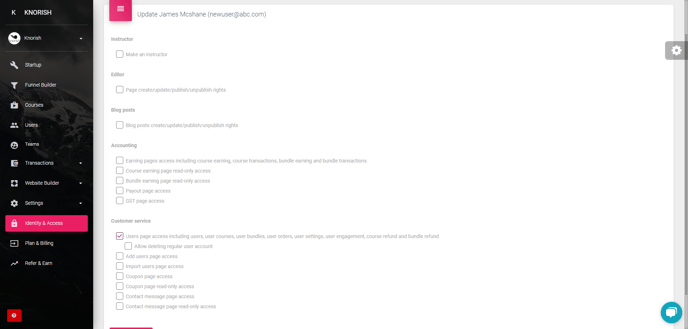
| Accounting | Access and monitor earning pages access including course earning and transactions, bundle earning and transactions, course & bundle earning (read-only access), payouts and GST pages. |
| Customer Service | Enable access to users page access including user courses, bundles, orders, user settings (changing name, email ID, phone number, password etc.), engagement, course and bundle refunds, add users page and import users page access, delete regular user accounts, coupon page access (full, view only), contact messages access (full or view only). |
The various permissions will also be visible on the Identity & Access page.
Important Considerations:
Email IDs are considered the primary identifier for a user. The same email ID cannot be added twice. However, you can choose to provide access to multiple roles to a user.
Adding Users and Assigning Specific Roles
Here’s how you can add users and assign them specific roles :
Adding A User As A Co-admin
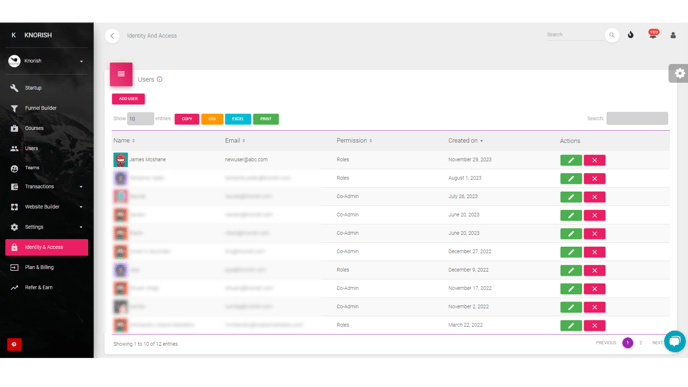
- Select Identity & Access on the Dashboard
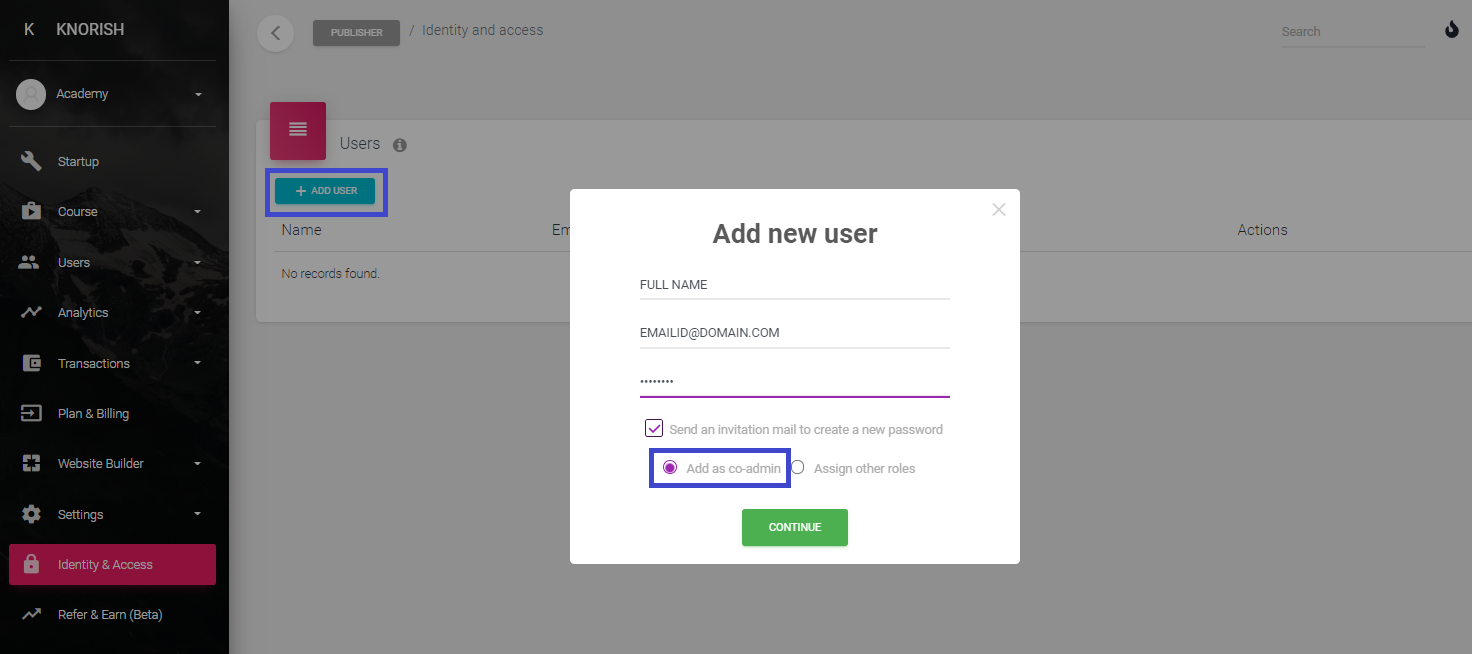
- Click on +Add User
- Under Add new user, enter Full name, Email Address, and Password
- Select Send an invitation mail to create a new password or leave it unchecked if you don't want the user to create a new password
- Select Add as Co-admin
Add Other Roles
As mentioned above there are several other roles and rights that can be given to users basis your requirements. Here's how to give specific access to other users:
- Select Identity & Access on the Dashboard
- Click on +Add User
- Under Add new user, enter Full name, Email Address, and Password
- Select Send an invitation mail to create a new password or leave it unchecked if you don't want the user to create a new password.
- Select Assign Other Role
- Select the rights that you wish to assign
- Click Save Changes
Note: Default admin will be visible on the Identity & Access page. However, the delete and edit buttons are disabled.
Deleting A User

Deleting a user is fairly straightforward.
- Simply click on the X button next to the name of the user
- Confirm your selection by clicking on 'Yes, Delete It'
The user will be deleted and the access will be removed from the site.