Uploading images with the right size is important to ensure the images look right on the site and add to its look.
Here is the list of image resolutions that can be used all along the platform to create your website or for the Blog on your Knorish site.
-
Banner Image

It is the image that helps in identifying the website. The first image you see after you have clicked on a webpage is the banner image. Therefore the banner image has to be attractive so that it enables the viewer to stay and read through your website.
Size Required - 1920x1080
-
Other Images

The image size edit button (orange link Icon) helps in identifying the size. These images to be used for creating the website and the blogs.
Size: Varies. Click on the Icon and then on change dimensions to identify the current size. The same method can be used to change the size of the image container to add a bigger image size.
-
Cart Images
These types of images are used for images over the call to action button. For instance, the image below shows a situation where you can use a cart image.
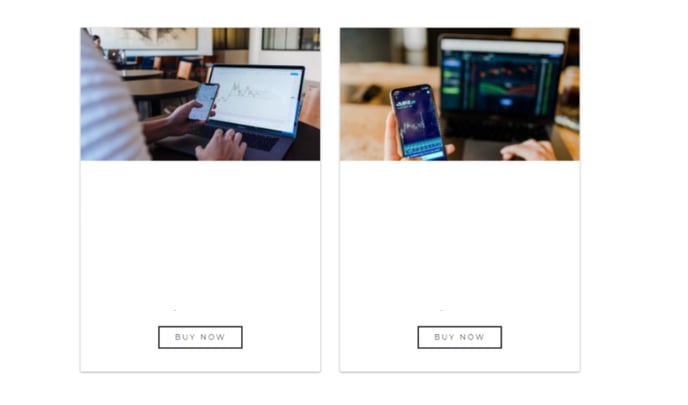
Size Required - Generally 660x480 Pixels (Changeable and may vary.)
-
Icons
This image can be used to show an icon that can be clicked. These images have to be small in size as well as the resolution.
Size Required - generally 150x150 Pixels
Note - A single image can only have a size up to 1 Mb to help in SEO and optimized site loading speeds.
Changing the Image Size
If you wish to alter the image size for the picture you just uploaded, you can do that by going into the Edit mode in Website Builder.

For example, let's say we want the image above to be shrunk in size. The current size for the image is 200x200 Pixels. And so follow the steps listed below to reduce the size to 100x100.
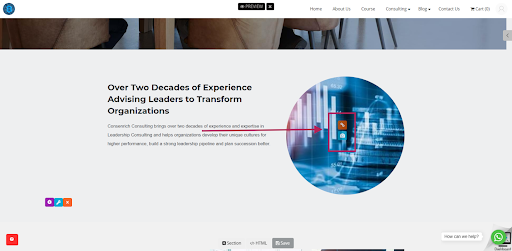
Hover the cursor over the current image, two buttons appear. The camera icon button is used to upload a new image. The orange button above it which has a Link icon is used to change the image size. Click on this orange button and a popup will appear.
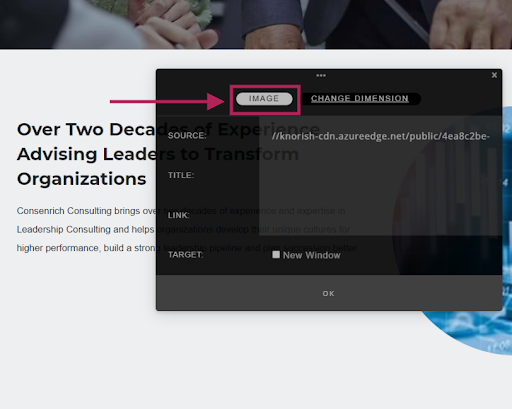
While the popup appears click on the Image tab as highlighted above. This is to be done to copy the source for the image in your clip folder.
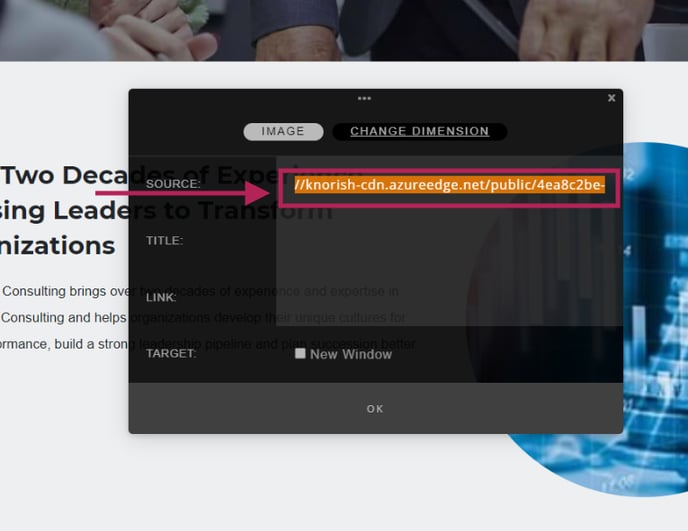
The image above shows the image source to be copied. After copying the image code, head to the section on the right of the image, Change dimensions.
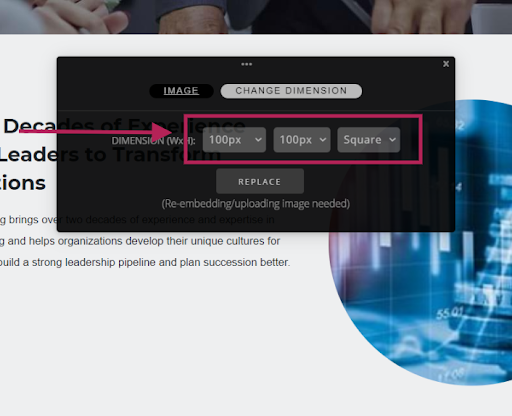
With the image above you can see the change dimension menu. For reference, we have changed the dimensions that are done using the pop-up menu, so now the new dimension is 100x100 Pixels.
Click replace and again click the Orange “Link” button. The popup will appear.
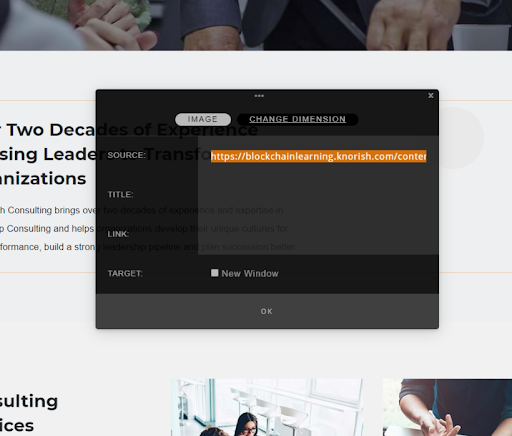
Now select the image source again and delete the one that is in the Image source replacing it with the one on the clipboard.

With this press, Ok and that would be it. The image would be changed with dimensions you selected of 100x100 Pixels.