The Meta pixel or Facebook pixel is a code that allows you to track visitor activity, track sales and more on your website. This is a super powerful tool simply because Meta Ads are really highly effective in driving traffic to your site. Hence, it makes absolute sense to use this tool. Installing Meta pixel would give you a better insight into your Meta ad campaign results, and you’ll be able to quickly create remarketing audiences.
Covered in this article
💡 Note: We highly recommend creating a business page for your business as that can then be also used for access management, building a community of followers, running targeted ads and more.
Conversion API-Based Pixel Integration
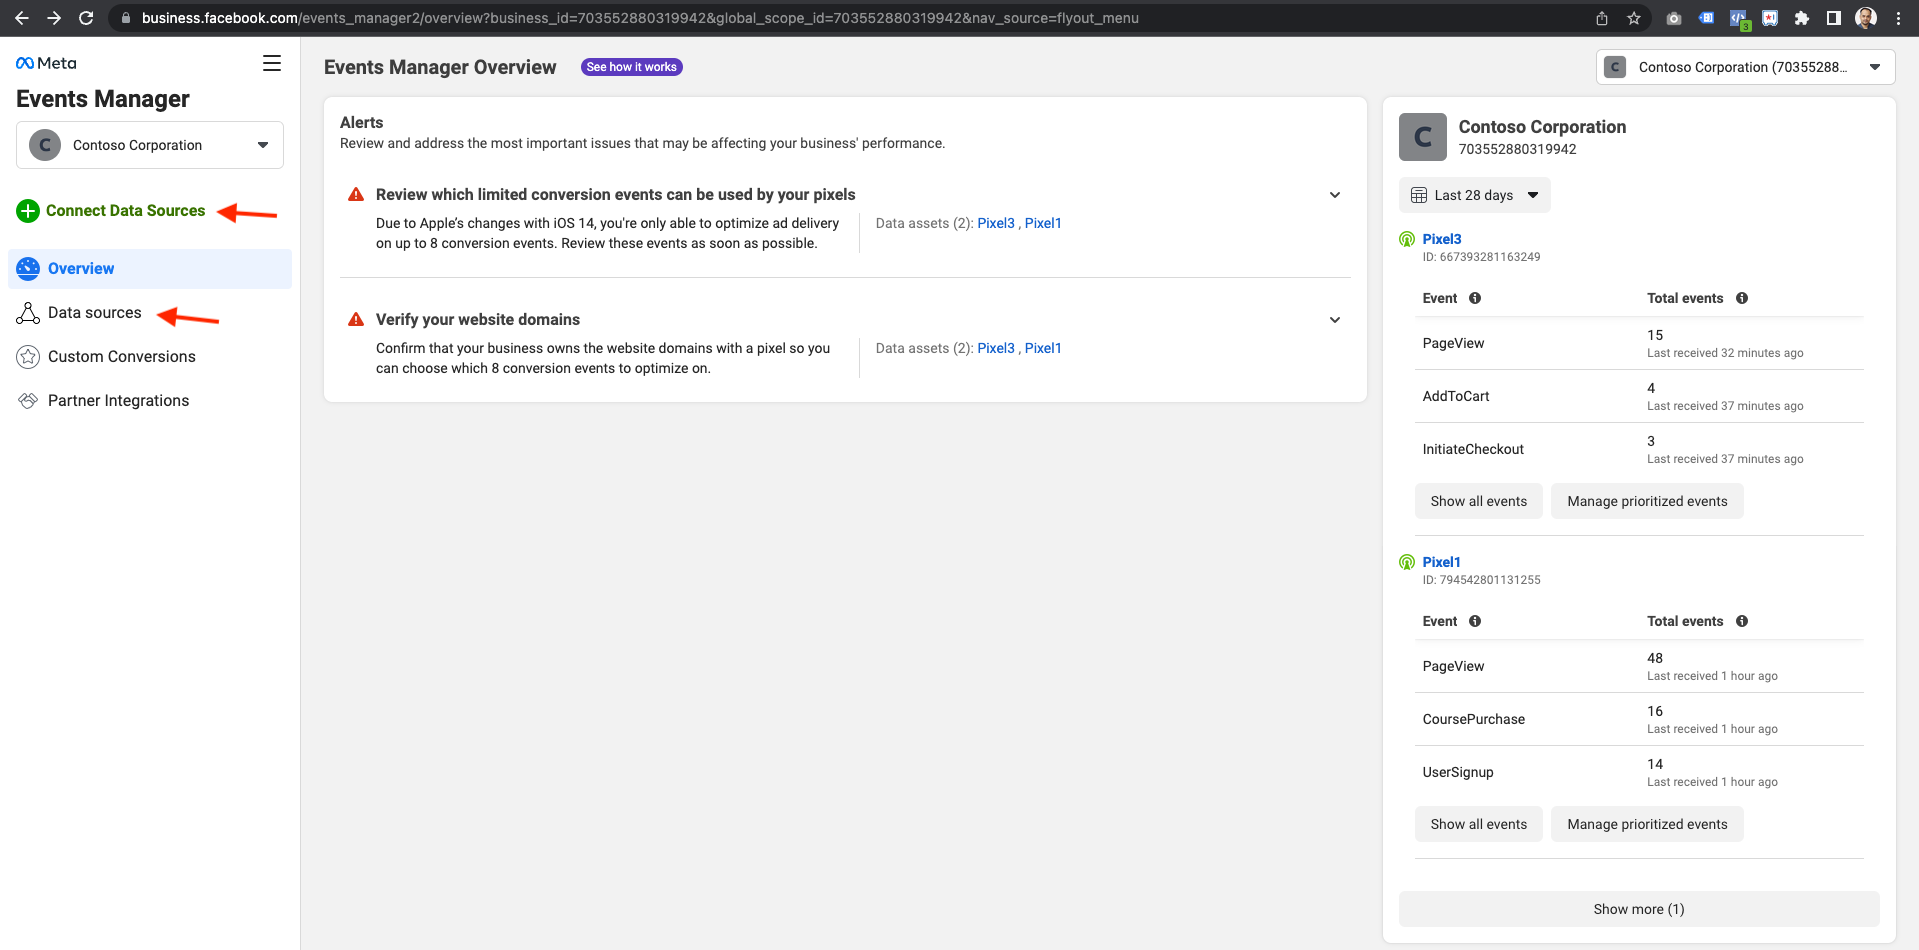
To get the pixel ID, open your Meta Events Manager page and then click on 'Connect Data Sources' to create a new one or click on 'Data Sources' to see the list of existing data sources. Refer to the below screenshot:
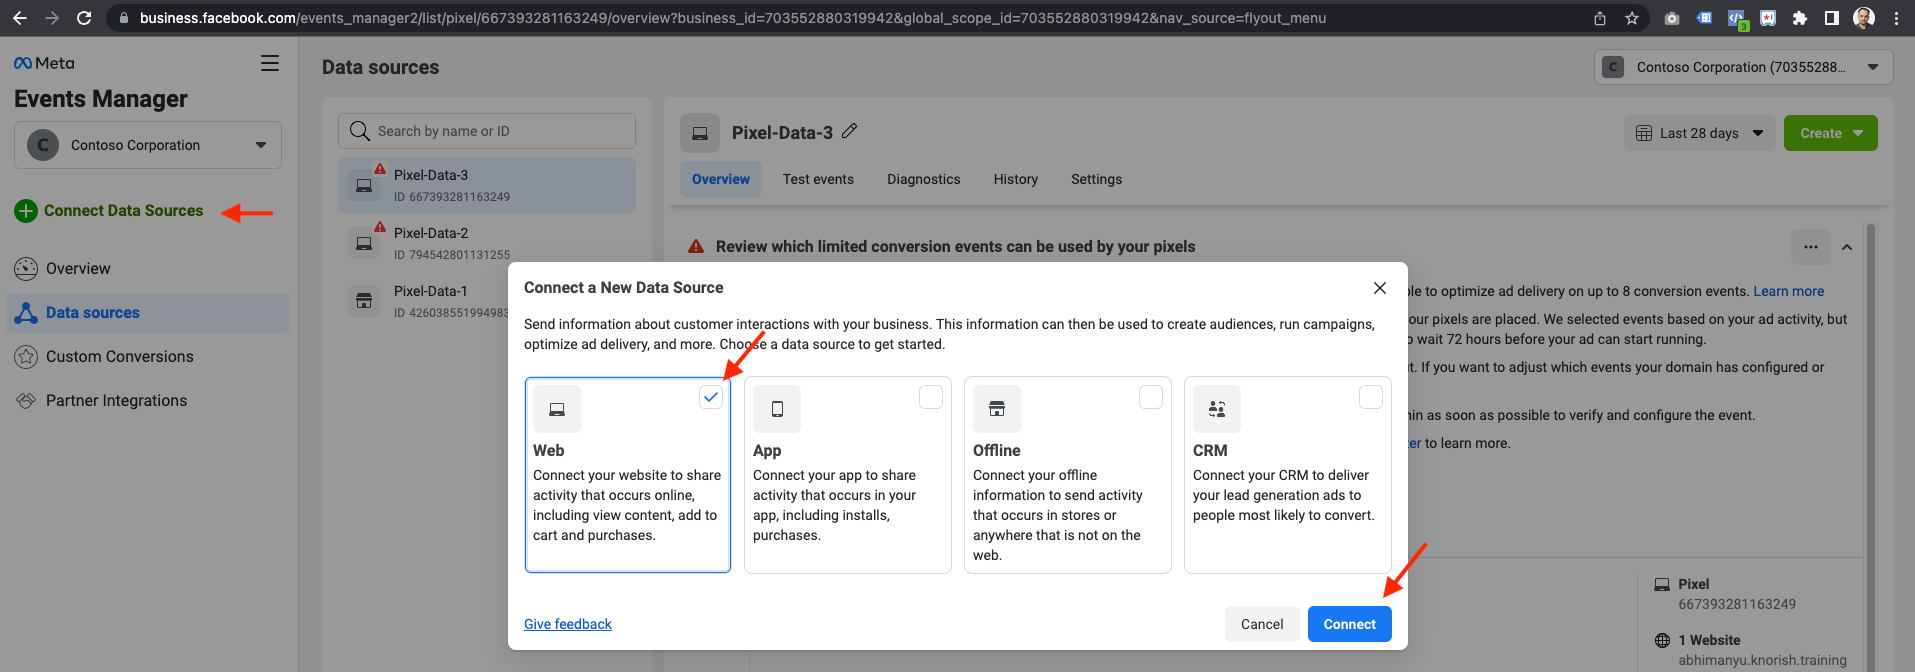
If you are going to create a new data source, you have to select 'Web' as a data source, refer to the below screenshot:
After the data source selection, give it a name and then click on 'Create Pixel'.
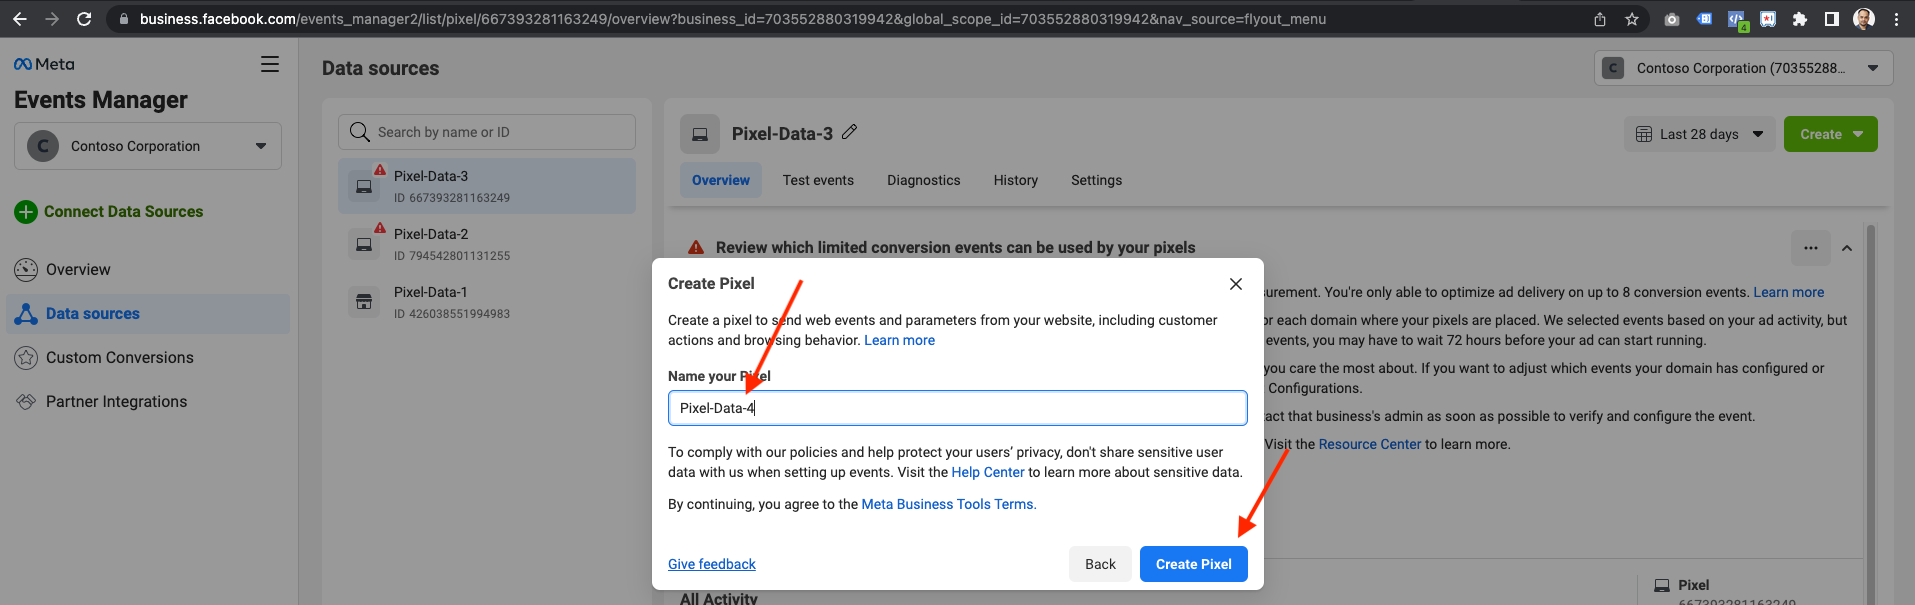
After entering the pixel name, enter the website URL that you plan to use for your ads.
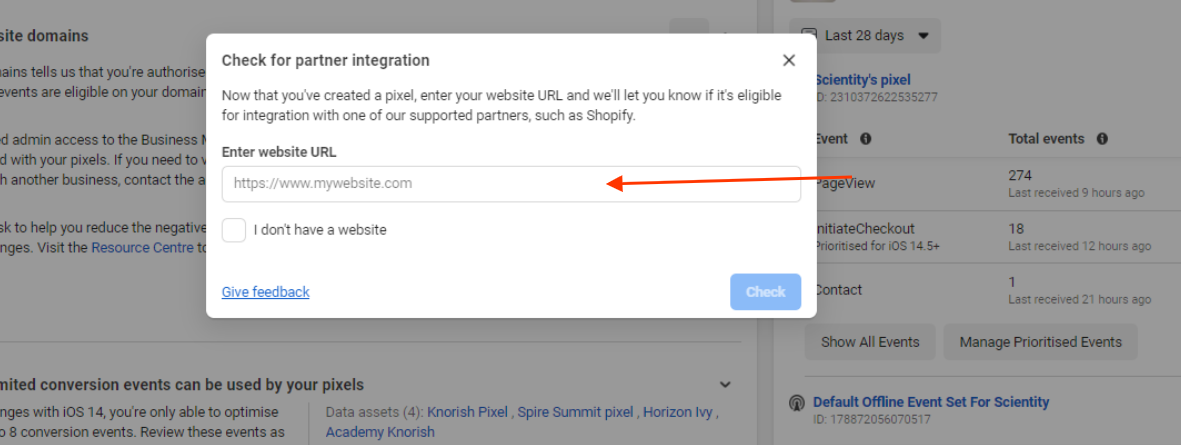
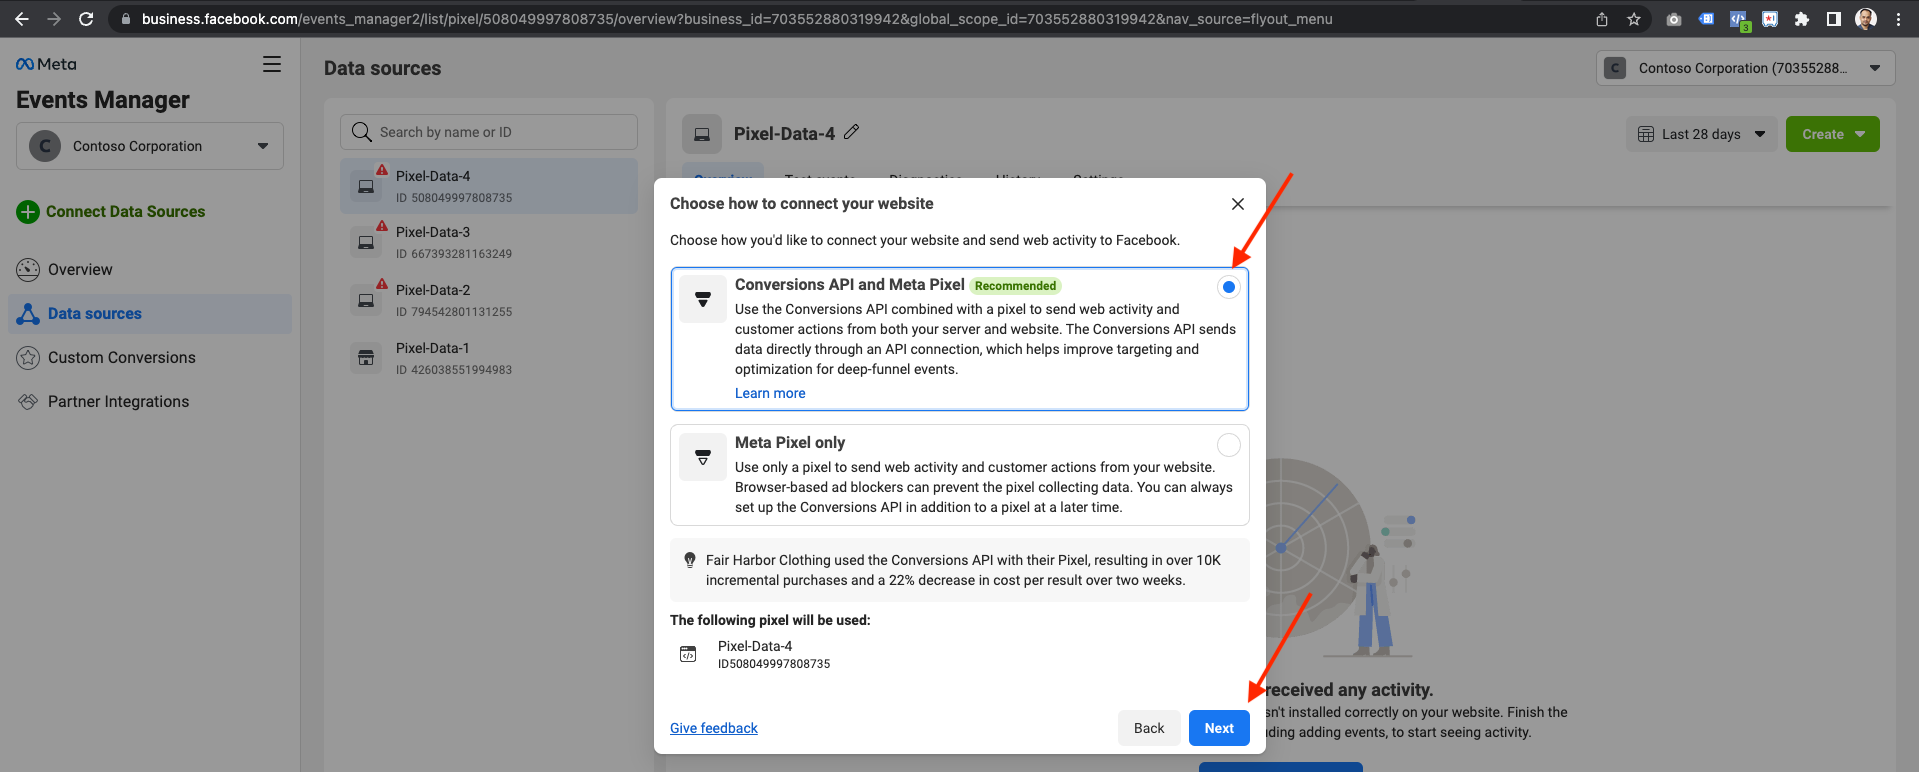
Now click on continue and then a new prompt will ask you to select how you want to connect website.
Always select 'Conversion API and Meta Pixel', because this is going to be one of the major decisions for tracking web activity from both the client and the server point of view '. If you select 'Meta Pixel only', this will only send events from the browser which might be blocked by browsers or browser-based ad blockers and thus lead to incorrect tracking data.
Now, this prompt will introduce you to the Conversation API or sometimes it's known as Enhanced Conversion API. You can safely close this window.

Congratulations, you have successfully created a new data source on Meta Events Manager. The next step is to configure it for event tracking from the browser as well as the server.
Configure Events and Parameters on Data Source
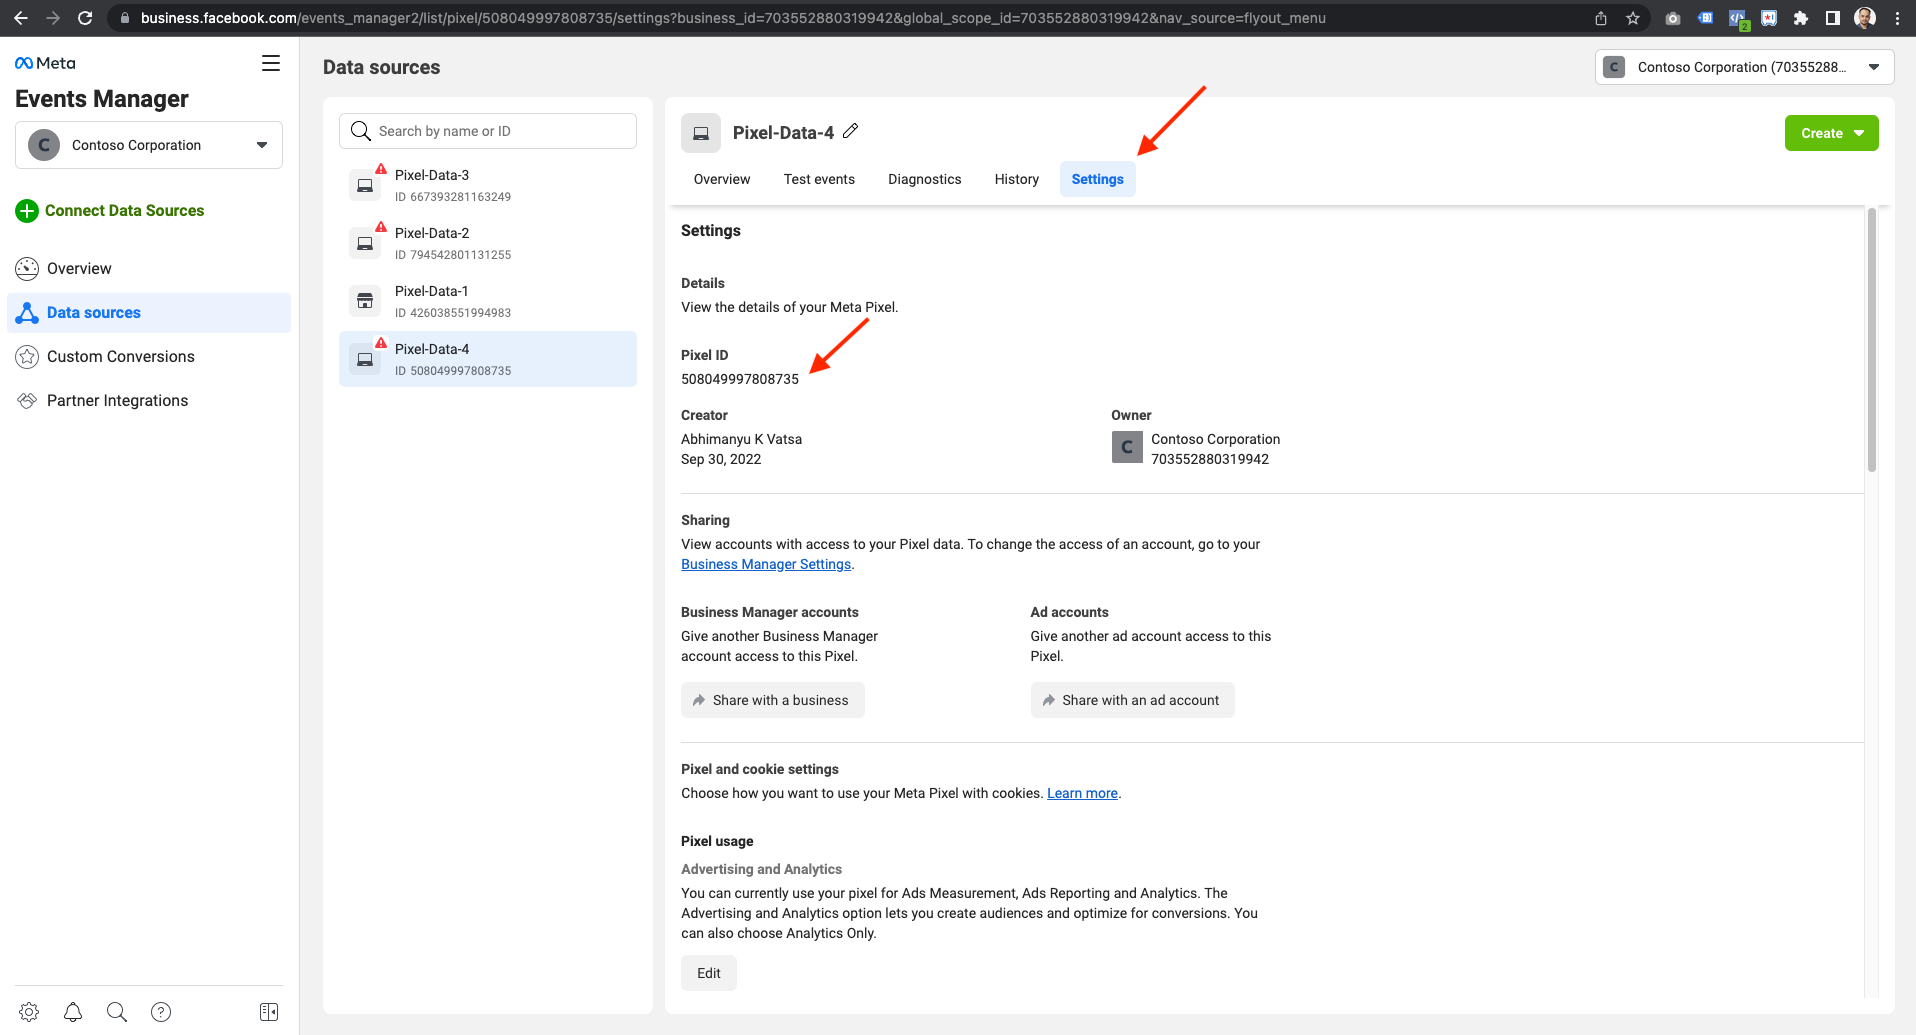
Let's configure events (and their parameters), and get pixel code, a token that you would need to save on the Knorish dashboard. To complete this open the 'Settings' tab and scroll down to find the 'Pixel ID' and 'Set up manually' sections.
Save this Pixel ID in notepad, you will need this on the Knorish dashboard. This is also known as Facebook or Meta Pixel Code.
Once you scroll down on the settings tab, you will see the 'Set up manually' section.
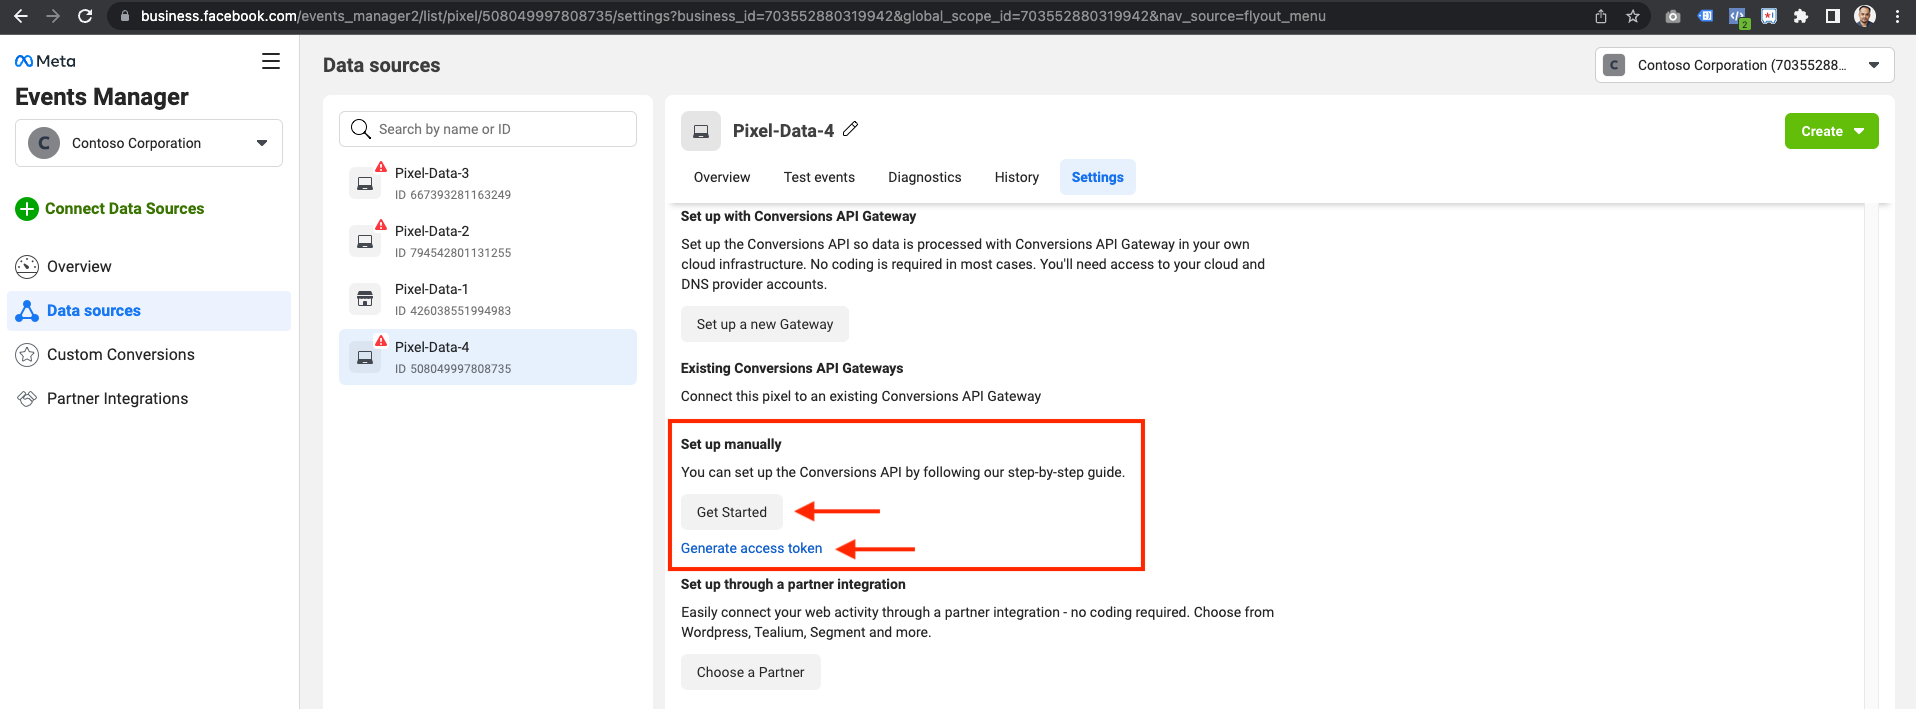
Earlier we got Pixel ID (that is pixel code), now let's click on 'Generate access token' to generate an access token.
Save this Access Token in notepad, you will need this on the Knorish dashboard.
Now click on the 'Get Started' button inside the 'Set up manually' section, this will open a new window. Click on the continue button.
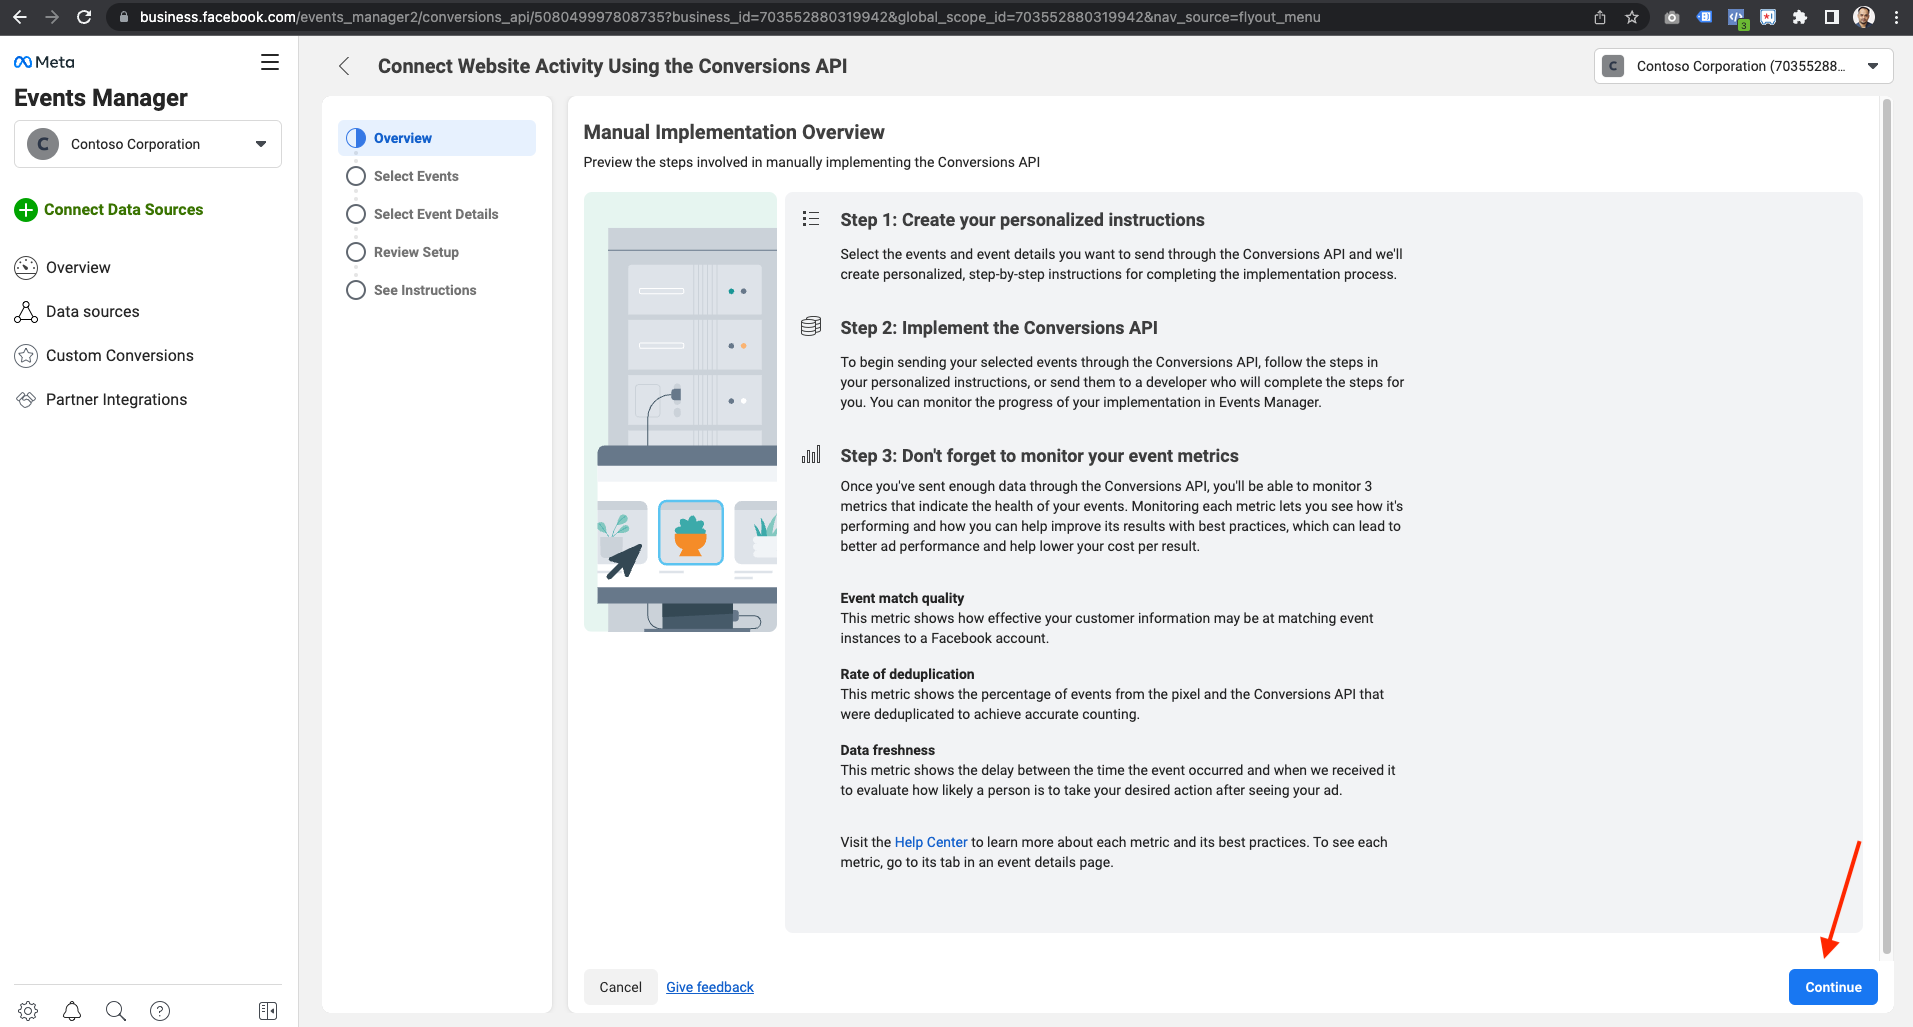
Now you are on the 'Select Events' step, where you need to select 3 events for Conversion API that is server-side tracking and click on the 'Continue' button.

💡Important Considerations:
- Server-side tracking (Conversion API or Enhanced Conversion API) only works for important business critical events that are 'Initiate Checkout' and 'Purchase'.
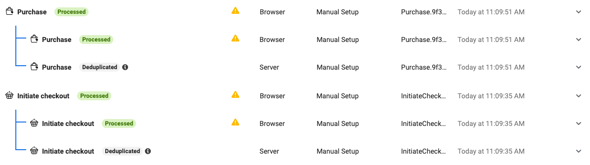
- Client-side (browser) tracking is always there throughout the user's checkout journey and this also captures 'Page View', 'Initiate Checkout', and 'Purchase'.
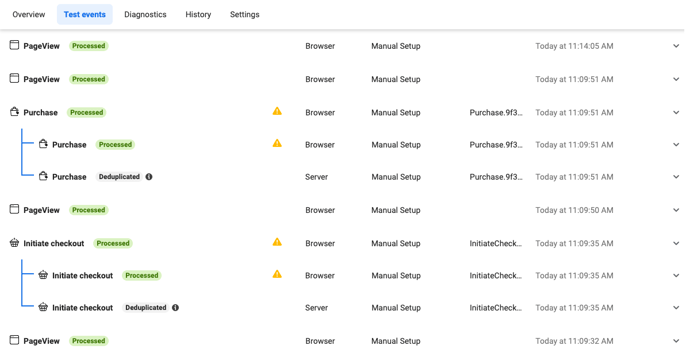
- Meta will automatically group them when they find the same call twice based on the internal event id, and that's why you may see the browser and server grouped together on the test event tab.
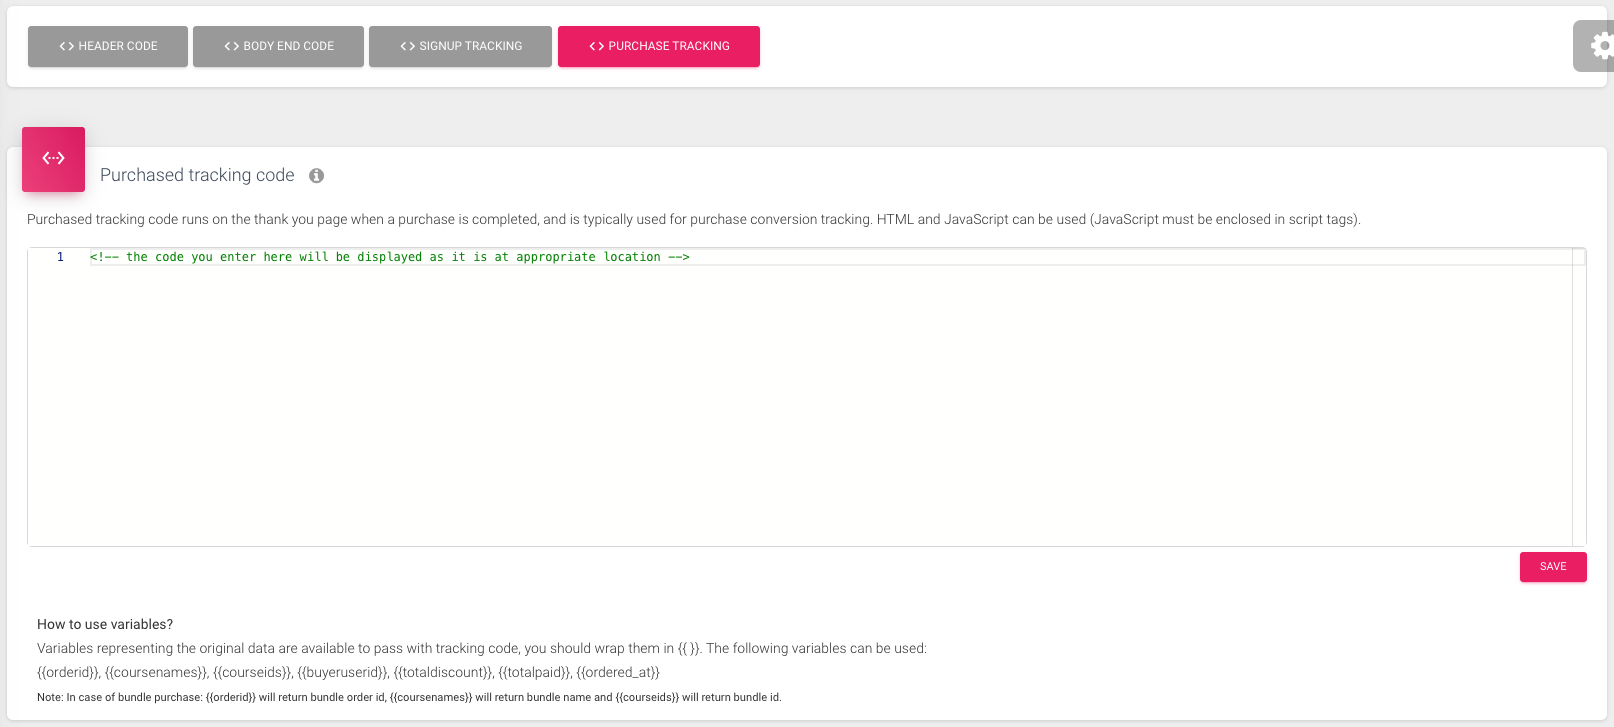
- If you want to track purchase events using custom code (client side, browser), you can do this using the custom code section on the dashboard.
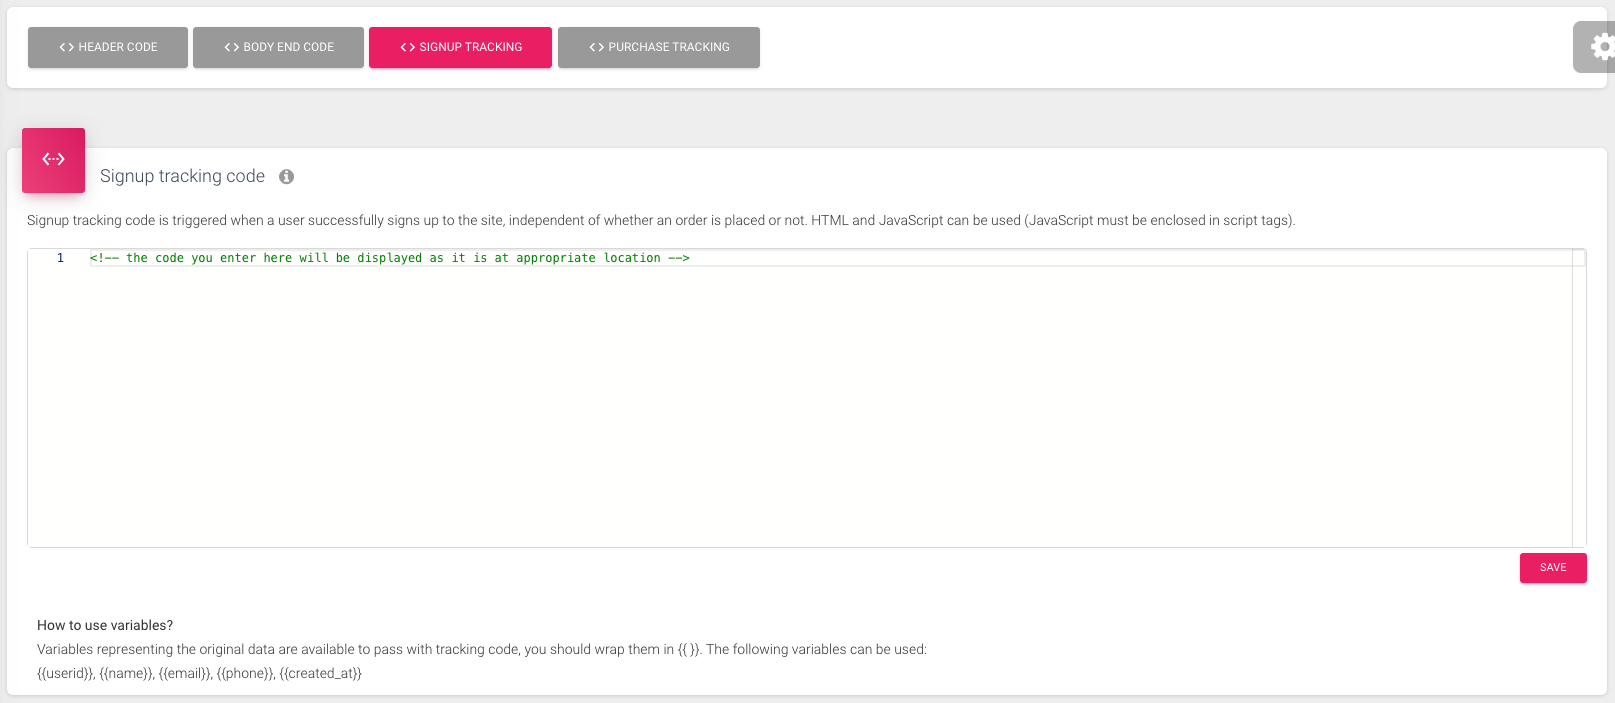
- If you want to track the signup events using custom code (client side, browser), you can do this using the custom code section on the dashboard.
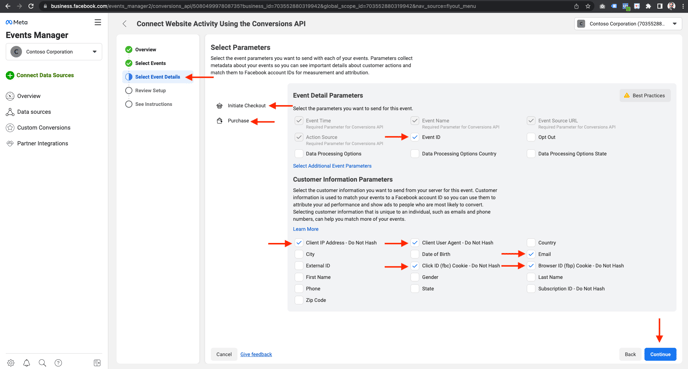
Once you have selected the 'Initiate Checkout' and 'Purchase' events, now you need to select exact common parameters (Event ID, Client IP Address, Client User Agent, Email and Browser ID) for all three events. Once you complete the parameter selection for all three events, you will see the 'Continue' button enabled. Click on the 'Continue' button.
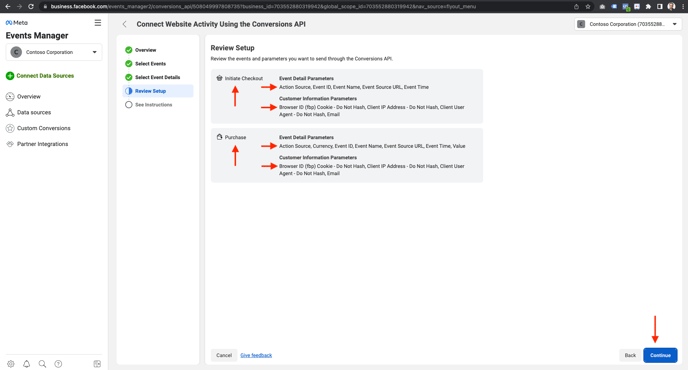
Now you can see all your events selection and their parameters. Now click on the 'Continue' button and then click on 'Finish' on the next screen.
One last thing, for testing purposes only, we would need 'Test event code', which you can get from the 'Test event' tab.
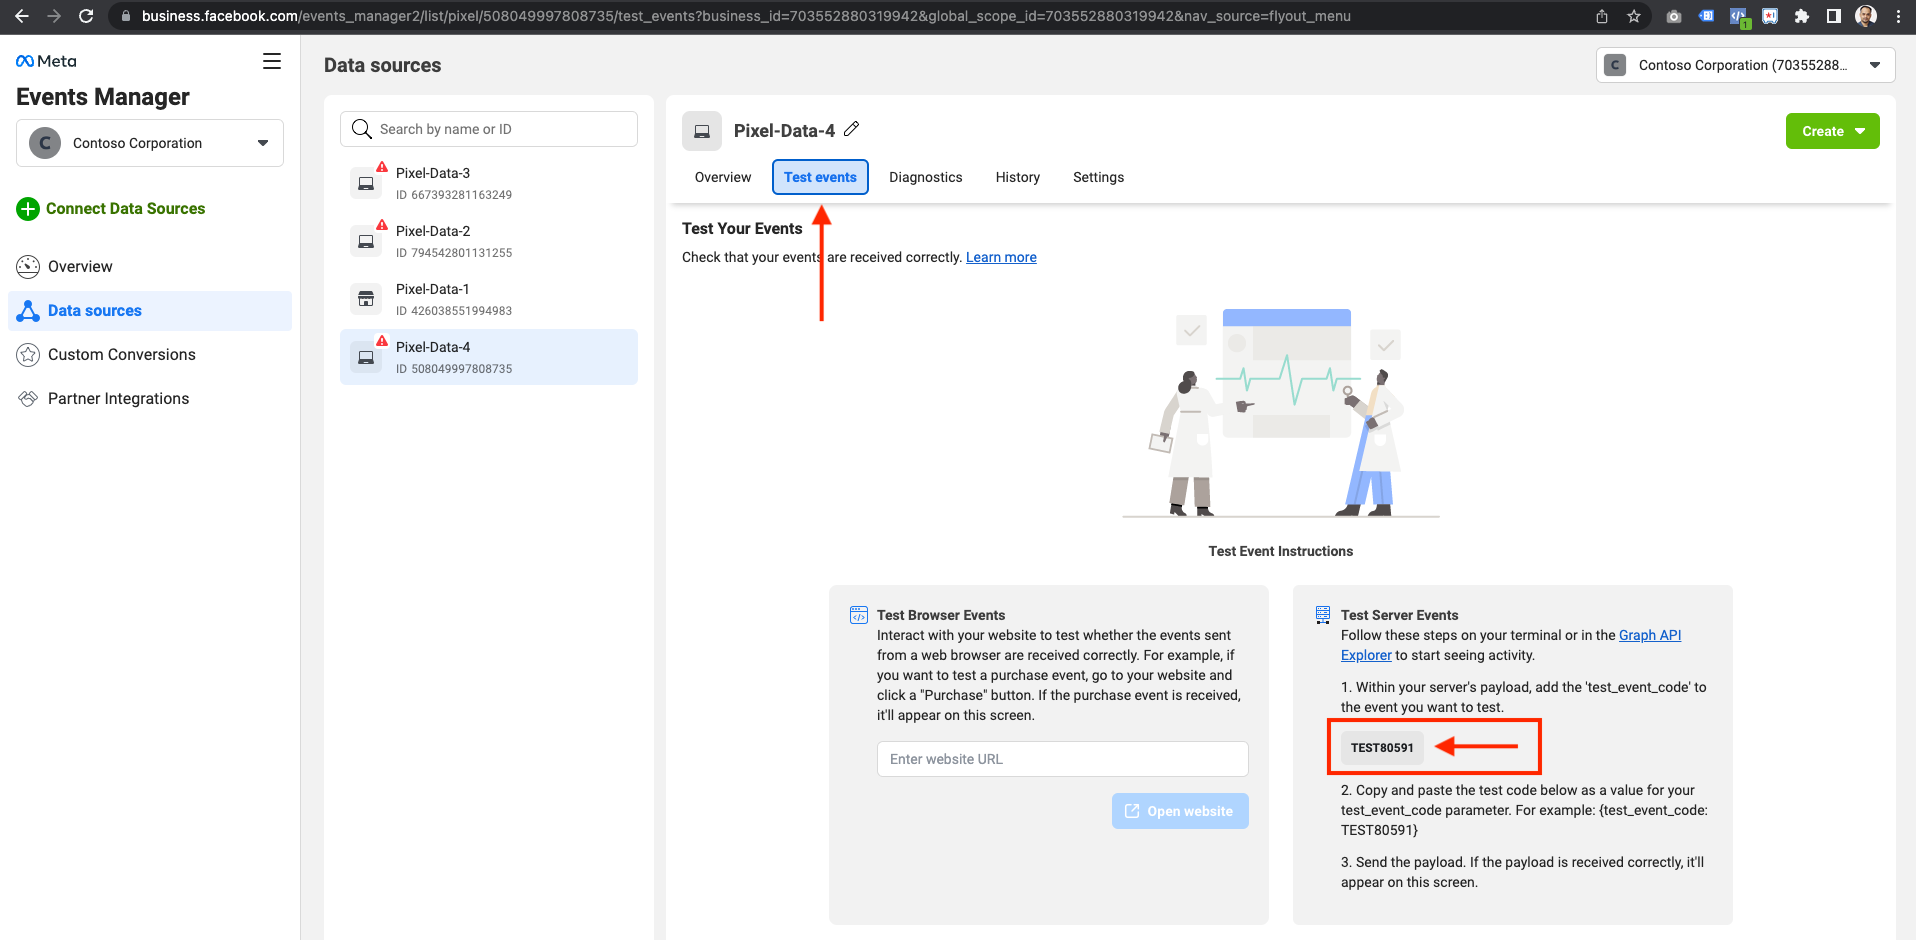
💡 Note: Save this test event code in notepad, you will need this on the Knorish dashboard.
Testing events from the Knorish checkout process
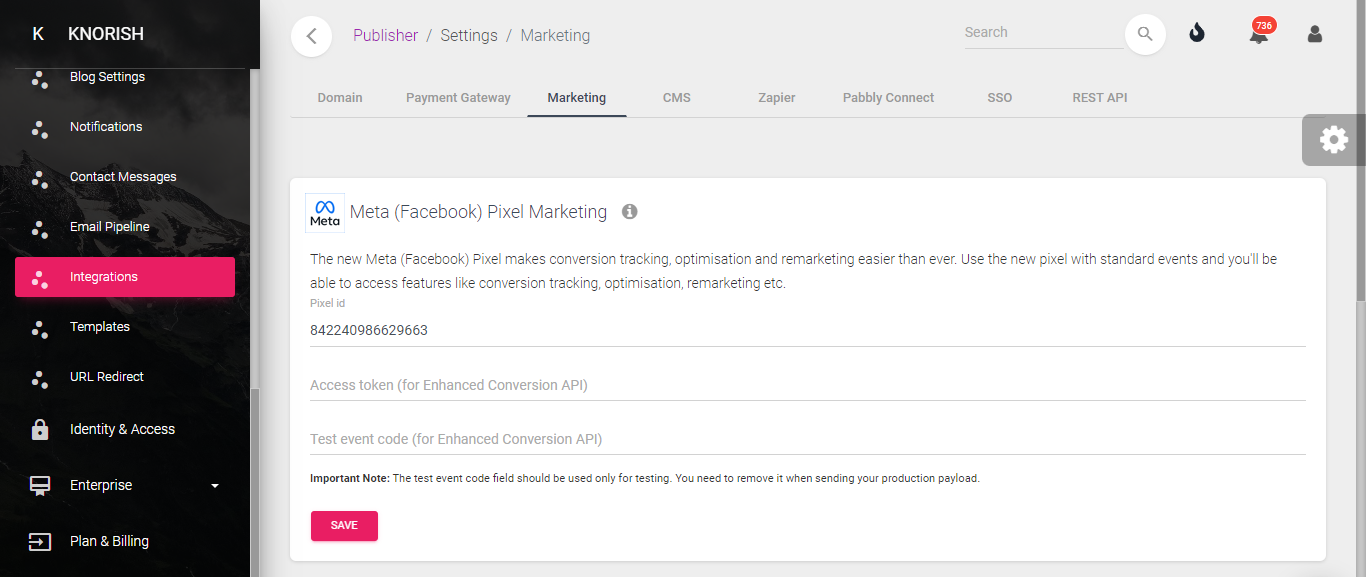
Open the Knorish dashboard Settings > Integrations > Marketing tab and save details from your notepad.
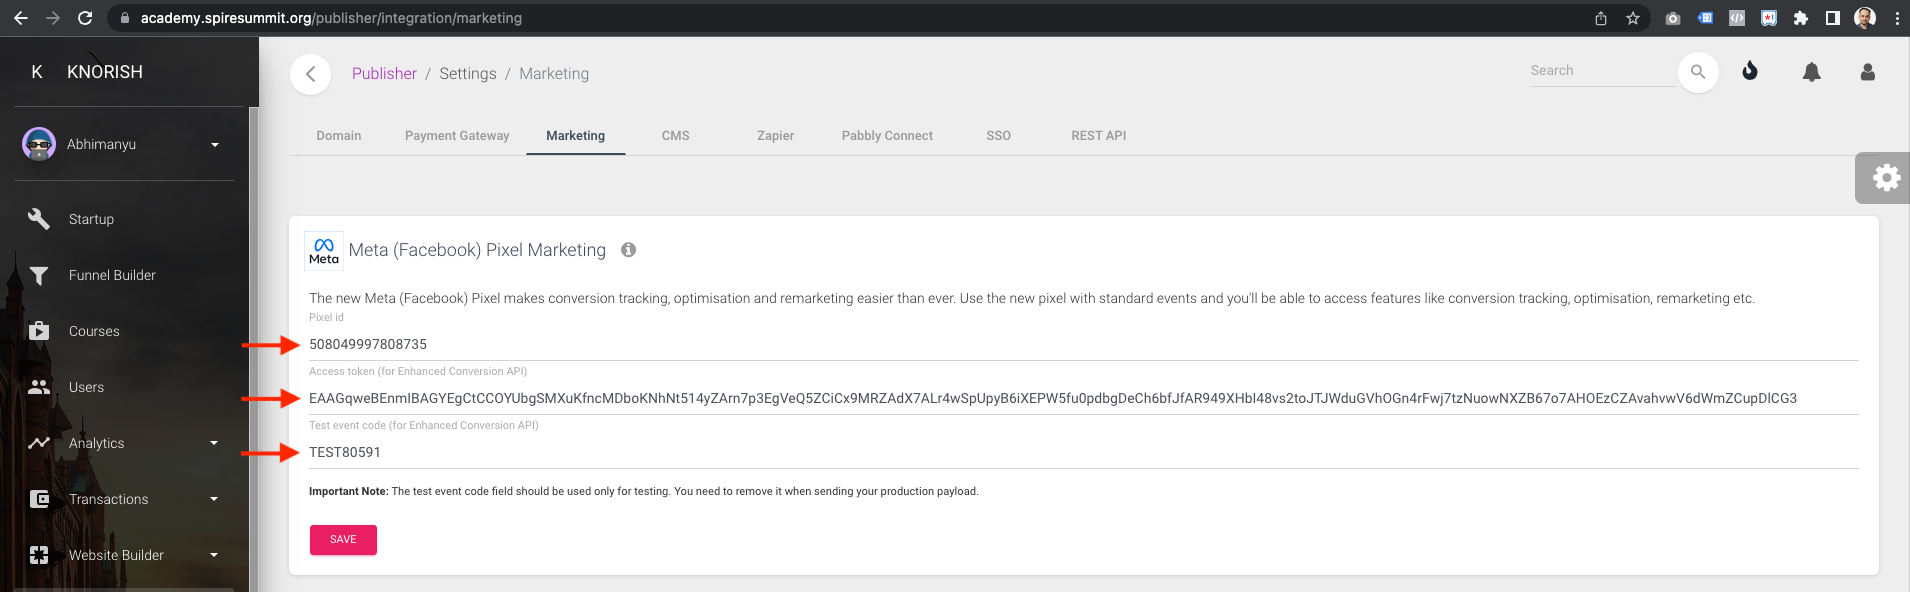
For testing, you would need:
- Pixel ID (also known as pixel code)
- Access token (Conversion API)
- Test event code
For production payload, you would need:
- Pixel ID (also known as pixel code)
- Access token (Conversion API)
Please note to remove the 'Test event code' and click on save on the Knorish dashboard for production payload and when going live.
💡Note: Please make sure to disable the browser ad blocker while testing. Else you will only see server-side tracking data generated by Conversion API.
Now sell a course or bundle either using regular checkout or express checkout on Knorish and you will see data being logged on the 'Test events' tab.
Once you completed your testing, remove the 'Test event code' from the Knorish dashboard and save it.
💡 Note: As soon as you connect Facebook pixel, all below listed events automatically start passing the data. Listed below are the events that are tracked:
- PageView - client-side tracking only
Tracks Page View Only - Initiate Checkout - client side, server side tracking with event id-based grouping
Tracks value, currency, content_type, content_id, eventID - Purchase - client side, server side tracking with event id-based grouping
Tracks value, currency, content_type, content_id, eventID