Offering one-on-one sessions can be a great way to provide personalized attention to your clients. By using Microsoft Bookings and MS Teams with Knorish, you can streamline the scheduling and hosting process, making it efficient and professional. This article will help you set up and manage one-on-one sessions, ensuring a seamless experience for you and your clients.
Covered In This Article
- Prerequisites & Setting Up Basics
- Enable Free Meeting Links via MS Bookings & Knorish (With Mandatory Customer Email Verification)
- Enable Free Meeting Links via MS Bookings And Knorish (Without Email Verifications)
- Set Up Paid Sessions Via MS Bookings And Knorish
- Syncing MS Teams Calendar With Your Google Calendar
Prerequisites & Setting Up Basics
To get started, you need to ensure you have the necessary accounts and access rights. You will need:
- Active Knorish Subscription
- Access to MS Teams license by Knorish
- MS Bookings access via Knorish credentials
How To Sign Up On Ms Teams With Knorish Credentials & Download The App?
Here’s how to access the MS Teams license to use the license offered by Knorish and download the app.

- Access your Knorish account > Startup
- Click on Settings > Integrations > Microsoft Teams
- Scroll down to the bottom to the section - Microsoft Teams by Knorish
- Copy the credentials from the section
- Click on Launch under Microsoft Teams
- On MS Teams, paste the credentials copied from the Microsoft Teams by Knorish section
- Once logged in, download MS Teams on your device/ laptop
You will be signed in to MS Teams.
How To Access MS Booking After MS Teams Setup
Once your MS Teams account has been set up using the credentials shared by Knorish, you can easily access features available with MS Bookings.
Here’s how to set up and get started with MS Bookings:
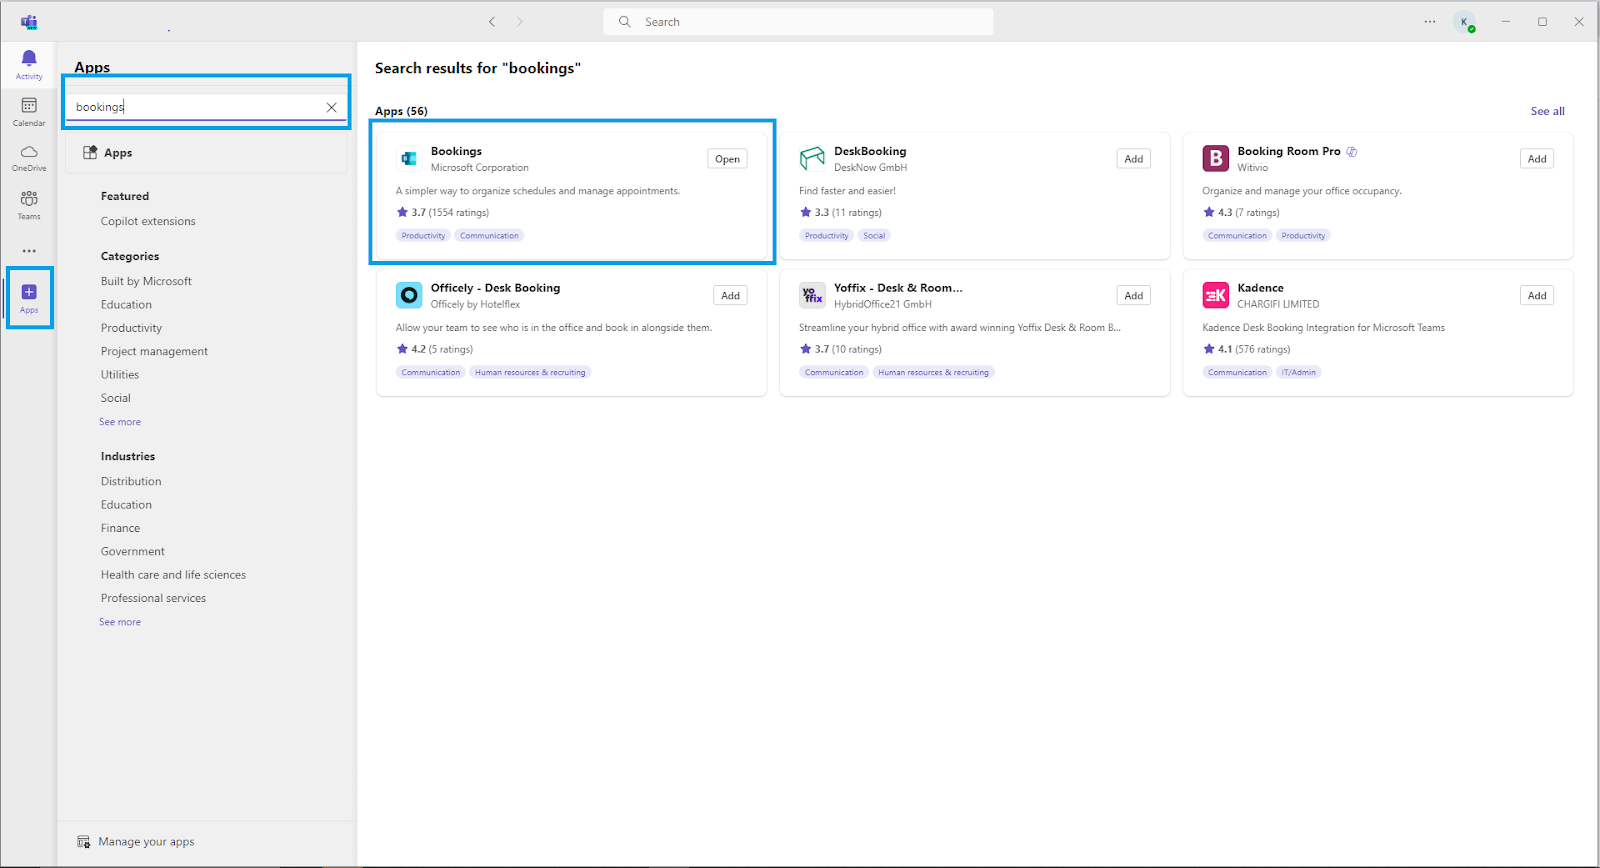
- Open MS Teams on your device
- Click On Apps
- Type Bookings in search
- Click on Bookings to start the app
You are now ready to set up your session booking options on MS Bookings.
Enable Free Meeting Links via MS Bookings & Knorish (With Mandatory Customer Email Verification)
MS Bookings default setup comes with two meeting options for 30 minutes and 60 minutes, you can add more options as well.
Here’s how to set it up using Knorish and MS Bookings:
Setup Meeting Options
- Login to your MS Teams account issued by Knorish
- Click On + Apps
- Search Bookings > open Bookings > open
- Under Personal booking page, click + Create meeting type
- Enter the name of the meeting
- Enter details such as the welcome message and meeting duration (eg., 30 minutes, 60 minutes)
- Ensure Teams meeting is enabled for online sessions
- Set your availability under Schedule customization:
- Choose Custom availability
- Define your available hours (eg., 10:00 am to 8:00 pm)
- Repeat the process for each day of the week
- Click on Advanced options to set up:
- Buffer time before and after meetings
- Lead time to specify how soon meetings can be booked (eg. Only after 8 hours from now)
- Maximum lead time for how far in the future meetings can be scheduled (eg, 30 days)
- Email reminders and follow-up emails
- Click Save to finalize your settings
- Copy the booking link and share it on your social media, website, or email signature
Create a Booking Page on Knorish
- In your Knorish dashboard, click on Website Builder
- Click Pages > New Page
- Choose a template and customize the design to fit your needs
- Insert the booking link:
- Click on a button > Link icon
- Paste the Microsoft Bookings URL into the link field
- Click on open new window for better user experience
- Save the page once all elements are in place
Once done, your link will be live. You can also paste the booking link on your social media accounts and elsewhere else to get meetings or sessions booked. Once a meeting is booked, and notifications are enabled, email and calendar invites will reflect on your Microsoft Calendar enabled via MS Teams and on the customer’s calendar as well.
Enable Free Meeting Links via MS Bookings And Knorish (Without Email Verifications)
This section will guide you through setting up a booking system in Microsoft Teams that allows users to schedule meetings without needing email verification.
Follow the steps below to configure this option:
Setup Meeting Options
- Login to your MS Teams account issued by Knorish
- Click On + Apps
- Search Bookings > open Bookings > open
Create a Shared Booking Page
- Click on + Create booking page
- Select + Create from scratch
- Enter a name for your booking page
- Choose the business type (eg., Education)
- Update business hours and add a logo, as desired
- Click Next
- From the dropdown select the admin account
- Set the office hours
- Click Next
- Select Anyone with the link to this page can book a meeting > Create > Get started
- Click on Booking page
- Review and adjust the scheduling policy:
- Time increments (slots available for booking).
- Minimum lead time (how early can bookings be made)
- Maximum lead time (how far in advance can bookings be made)
- Under customize your page:
- Customize the page colors to match your brand
- Set the time zone by typing in your city or location
- Click Save
Add and Configure Session Slots
- Click on Services
- Edit the default service
- Enter the name of the session type (eg., 30-minute session)
- Provide details about the session
- Ensure Add online meeting enabled
- Set the duration (eg., 30 minutes)
- Adjust availability and scheduling settings as needed
- Assign staff to the session
- Customize the fields required for booking (e.g., email, phone number)
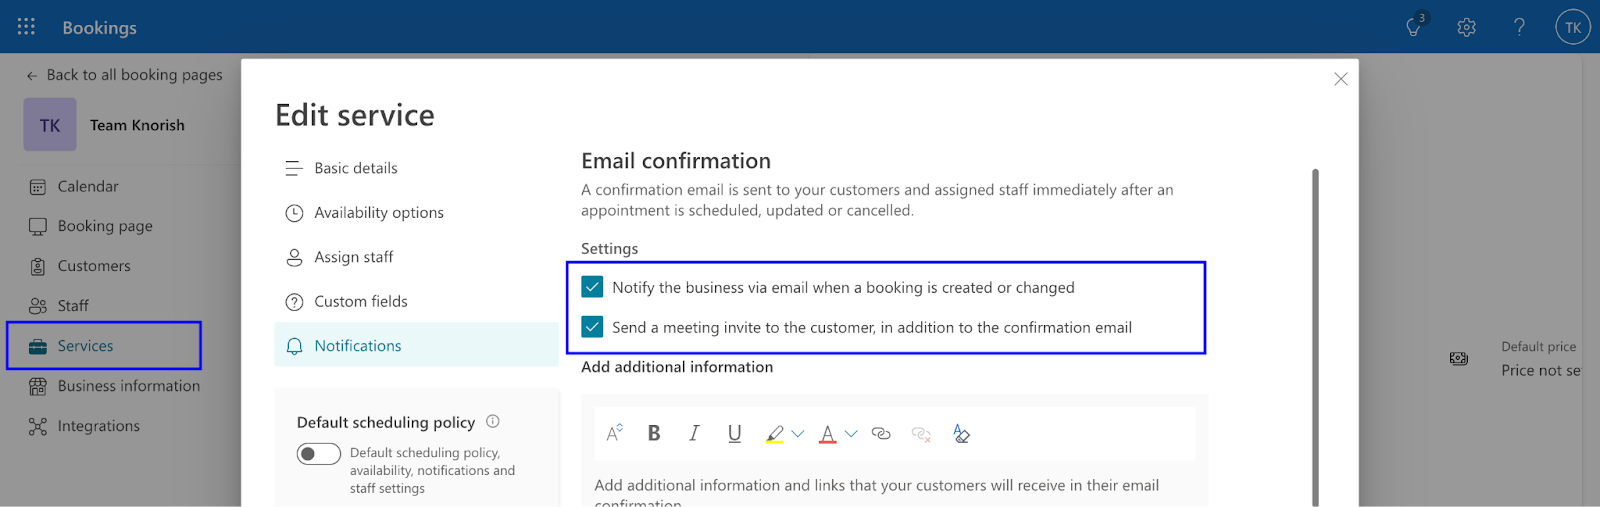
- Set up notifications and reminders by ensuring to click on the two options in Settings
- Click Save changes
- Replicate the process to setup more slots as needed
Adding The Booking Links on Your Website
- Access your Knorish Dashboard > Website Builder
- Click on Pages and select the page where you want to add the booking link
- Under Action, click on Edit
- Edit the page and add a button or link element
- Click on the link or button and click on the link icon
- Under link section, paste the booking link from MS Bookings
- Ensure the link opens in a new window for better user experience
- Click Save
- To test the connection, click Preview and paste the URL on a new tab in incognito
Your link will be live. You can also paste the booking link on your social media accounts and elsewhere else to get meetings or sessions booked. Once a meeting is booked, email and calendar invites will be reflected on your Microsoft Calendar enabled via MS Teams and on the customer’s calendar as well.
Set Up Paid Sessions Via MS Bookings And Knorish
This section will guide you through setting up payment options for your booking sessions, allowing you to collect payments seamlessly.
- Access Microsoft Bookings To Setup Booking Link
- Setup Meeting Options
- Login to your MS Teams account issued by Knorish
- Click On + Apps
- Search Bookings > open Bookings > open
- If you already have services created, select the service you want to offer as a paid session
- If not, create a new service by clicking on Create booking page and following the setup instructions listed in the section above - Enable Free Meeting Links via MS Bookings And Knorish (Without Email Verifications)
- Once done, navigate to the service details and copy the booking page link for the specific session you want to charge for
Setting Up The Link On Knorish Landing Page To Automate Payment Collection & Meeting Setup
-
Log in to your Knorish account.
- Click on Courses > New Course
- Enter the name of the course > click Create
- Add a new section and give it a name
- Add a chapter and name it appropriately
- Under content type, select Page Builder and click Create Page
- Customize the page as desired
- Add a button or link element
- Click on the link or the button and click on the link icon
- Under link section, paste the booking link from MS Bookings
- Ensure the link opens in a new window for better user experience
- Customize the button’s appearance
- Click Save to save changes
- Click Preview to see how the button looks and test the functionality
- Under Settings, fill in the pricing and other details
- Click Publish Course
- Next click on Landing Page > Add Page
- Choose a theme and design the landing page
- Add details about the paid session
- Add a button or link element to the page
- Click on the link or button and click on the link icon
- In the button/link settings, under Type select - Course Checkout Link
- Under source, select the course name where the meeting link is enabled
- Update the Text for the CTA button
- Click ok
- Repeat the process for all the buttons or links where necessary
- Click Save to save changes
- Click preview to test the functionality
Your course will be published with the meeting link. Once someone clicks on the button on the landing page, only after payment will they get access to the page for booking the meeting. Once the meeting is confirmed, if the notifications are turned on, the user and you will get email and calendar invites with the MS Teams link.
Syncing MS Teams Calendar With Your Google Calendar
In order to ensure that as a host, you are also notified of the meetings booked by customers, please download the Microsoft Teams app from the play store or iOS Store. Additionally, you can also sync the MS Teams calendar with any calendar of your choice for a constant sync and to be notified of changes in any of the meetings.
- In Microsoft Bookings, click on Settings
- Click Calendar > Shared calendars
- Select the option Publish a calendar
- In the dropdown, select the calendar you want to publish
- Under permissions, select Can view all details to ensure all meeting details are visible
- Click Publish
- Click on the ICS option and copy the link provided
- Open Google Calendar in a web browser
- On the left sidebar, under Other calendars section, click on + to add a new calendar
- Select from URL
- Paste the copied ICS link from Microsoft Teams into the URL field
- Ensure Make the calendar publicly accessible option is selected
- Click Add calendar
- Once added, your MS Teams bookings will be sync to your Google Calendar
- Check that all events are visible and properly synced
That’s it. All new bookings or any changes made to existing bookings, such as rescheduling or cancellations, will automatically sync between both calendars.
💡 Important Considerations
- Using a personal bookings page will ensure no spam users are able to book your calendar via Email verification code.
- Shared booking pages don’t mandate the user to confirm email verification code.
- Customize the banner image by clicking on Edit Banner Image under See more options ( …) on MS Bookings.
- To update the display name on your MS Teams & Bookings account, access your knorish dashboard. Under Settings > Integrations > Microsoft Teams, click on Edit Display Name, next to the credentials assigned. The name will be updated within 24 hours.
- In the calendar settings, ensure that you do not unpublish or reset the links in the Microsoft Teams calendar settings, as this will break the sync with your other calendars.