Need to add custom files to your website, give away high-value content or store images or videos in your site built with Knorish? You can use the file manager for that.
This option is used to add files directly from your desktop/laptop wherein the files are not available online and should not be available in the future as well.
A. Steps to use the File Manager
B. Adding the file to a button or a link text
Uploading Files on Knorish To Avoid Using Public Access Domains Such as YouTube/ Vimeo etc
You can avail this feature to upload videos/images/pdfs/ documents on your Knorish site so that you can avoid uploading them on common platforms such as YouTube/ Vimeo etc. This ensures that your content stays on your site.

Note: While there is no limit on the number of files that can be uploaded on the File Manager but for an individual file the size limit is 100MB per file. This is only for the front end i.e. the website.
Types of files that can be uploaded are mp4, wmv, avi, mkv, flv, svg, png, jpg, gif, pdf, zip, doc, xls, ppt, txt, csv and you can accordingly get the URL(link) of the file in the list showing under icon & URL in file manager.
A 100 Mb file size limit ensures that the page loading speed remains low. Higher file sizes will lead to the website and the pages slowing down, leading to the page not opening on devices with low internet speed, an increase in the number of people closing the website even before the page opens properly and also poorly impact your site's SEO.
Hence, if you are uploading videos, you can compress videos to smaller sizes without compromising on quality. Here're the instructions: How do I compress videos or reduce the video size?
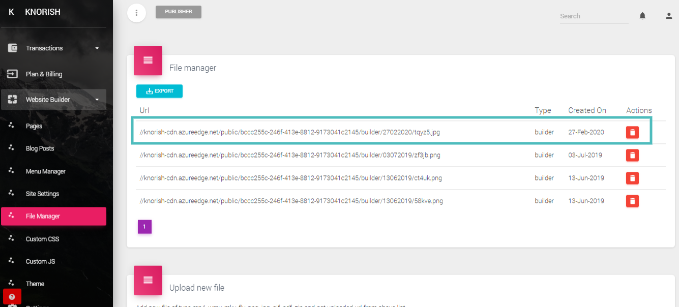
A. To use the file manager, follow these steps:

- Login to your Knorish account and access the website builder section on the Dashboard
- Here, you can see that previous files have been added. To add your new files, scroll to the bottom of the page
- Click on the upload file and add the file from your Desktop/Laptop. Once done, a new link is created on the top section of the page
4. You can now copy this link and add it on any page as a link, hyperlink or on a CTA button on your website, for example, to provide downloadable assets on your website such as EBooks/ PDFs, etc.
Note: The 100MB file size limit is only for the website and its pages. The course content section in the course builder has a file size limit of 2 GB per course content.
B. Adding the file to a button or text
- Access the page where the downloadable file needs to be enabled
- Select the text where the downloadable file needs to be added
- Click on the Link icon which will bring in the ‘Edit Link’ button to your screen
- Paste the link in the space provided for ‘Link’.
- Change the text of the button as needed
- Click on ‘Ok’ to preview the changes made
- Click on the Save button to confirm the changes to your website
- Access the site in preview mode and click on the button to see the PDF opening on a new tab ready for download