This article goes over how to add/import users and assign them the courses, bundles or teams manually and via the bulk importer. With the Add User option, you can give access to courses and bundles to one learner at a time, and with the Import Users option, you can bulk import a list and give access to courses and bundles to all in the list in a single go.
Covered in this article
- Add a new user to course, bundle or team
- Bulk import users to course, bundle or team
- Add an existing user to a course bundle or team
- Import users to course with a specific access expiry date
- Import users to bundle with a specific access expiry date
- Create a team to assign courses in 1 click
- Remove course access for a team
- How do users access the course(s)?
- Important considerations
Add a new user to course, bundle or team
- Go to Dashboard> Users > Add User
- Fill in the Name, Email ID, and Mobile Number
- Select Assign a course, Assign a bundle or Assign to team and select the specific course/bundle/team from the drop-down in order to provide access to the selected option
- Select 'Do not Assign' if you just want the user to be added to the site
- As the case may be, select 'Send create password email to new users' and 'Send assign course/bundle notification' if you wish the user to be notified
- Click on Add User
Bulk import users to courses, bundles or team
Before you can run a bulk import, you will need to make sure you have a spreadsheet prepared.
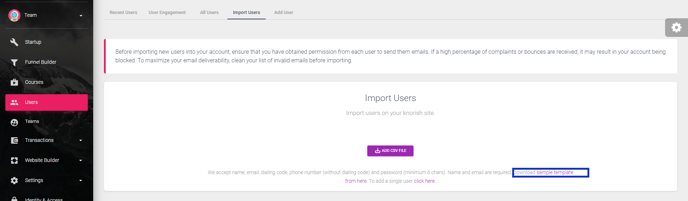
Download a sample template from the Import Users section from the file for reference. For importing more than one learner, and sending them the notification mailers on the dashboard you can opt to bulk import and notify users. Here are the steps to follow:
- Go to Dashboard> Users> Import Users
- Download the sample template
- Add the user data in the file in the format listed above
- Once the import file is ready, click on Add .CSV File
- You will be asked to Map .CSV File Columns
- Select “Name” in Select Name In .CSV File
- Select “Email” in Select Email In .CSV File
- Select ‘’Dialing code’’ in Select Dialing Code In .CSV File (should not contain +)
- Select "Phone Number" in Select Phone In .CSV File
- Select "Password" in Select Password In .CSV File
- Click on Display Users
- Select Assign a Course/Assign a Bundle/ Assign to team as required.
- Accordingly, select the Course/Bundle/Team from the drop-down
- Check the box for Send assign course/bundle notification, if you wish to notify users of being assigned a course/bundle
- Click on “Import Users”
The users will be imported and in case the option ‘Send Create Password email to new users’ is selected, the email for password creation will be sent automatically to all the new users only.
Add an existing user to a course bundle or team
Knorish makes it easy to add an existing user to a course bundle or team. Here's how:
- Access the dashboard
- Click on search and type in the name, phone number or email ID of the user
- Locate the user details and click on the name
- Under Courses, select Assign Courses
- Next, select all the courses that you wish to assign to the user
- Select the options of sending update notifications to users about creating a new password or about the course/bundle addition notification.
- Click Add To Course
Similarly, click on Assign A Bundle or Assign to Team to add the user to the specific bundles or teams.
Import users to course with a specific access expiry date
In case you wish to ensure that the course expires after a specific date, especially for a list of imported users, follow the process below:
To enable this, first, go to that specific course under Settings, and select the course access duration for new learners to 7 days. Import the users to provide course access and the course will then be assigned automatically for 7 days. This will leave the 7 days access option on for new users and all new enrollments will still get the original date.
Here’re the steps :
- Select Courses> Course>YOUR COURSE
- Go to Course Settings
- Scroll to Set Course Expiry In Days
- Fill in the no. of days, press Enter
- In Confirmation Pop-Up, Select 'Only For New Enrollments'
- Click Okay to proceed
Once this is done, import the list of the users as per the process listed above in Import users in bulk and give access to the course.
Post that, follow the process below again:
- Once the list is imported, head back to the course settings of the specific course
- Scroll to set course expiry in days
- Fill in the original course expiry no. of days, press Enter
- In the confirmation pop up, Select 'Only For New Enrollments'
- Click Okay To Proceed
Import users to bundle with a specific access expiry date
To import or add users to a bundle with a specific access expiry date, you can create a free payment option with an expiry date added. Any new user added or imported will automatically get access to the bundle based on that specific expiry set on the bundle under the free plan option. Here's how this is done.
- Select Courses> Bundle> Access an existing bundle or create a new bundle
- Under Publish, go to 'Select a pricing plan for your bundle' section
- Under Free, click on Add. Add the title of the payment option
- Then under 'Expire bundle after' select days, weeks, months, or years and add the number applicable for the expiry
- Click Save to proceed
- Under Bundle prices, the new pricing option will be listed
Once this is done, add a user or import the list of the users as per the process listed to give access to the bundle. The users will have access to the bundle based on the expiry date chosen in the free payment option.
Create a team to assign courses in 1 click
Teams are primarily created for specific groups such as classes, interest-based groups for specific or multiple courses assigned to one group, and more.
- To create a Team, Go to Dashboard and Select Teams > Select New Team
- Name the new team and click on Create
- Switch to the Users tab in order to add users to this team:
You can add Existing users by clicking on the +Add from the Existing section Or, clicking on +Add new user for single user import or +Import users to import a CSV file with the list of users - Once the team is created, on the Courses tab, click on the +Add course button > Select the courses and click on +Assign and these courses will then be assigned to everyone added to this team
Remove course access for a team

In order to remove a course from a team, go to Dashboard> Teams > Select Team, on the Courses tab, click on the X icon under Action to remove the course from the Team. Please note that removing a course from a team will also remove access to that course for the team's users.
Remove user from a team

In order to remove a user from a team, go to Dashboard> Teams > Select Team, switch to the Users tab, and click on the X icon under Action to remove the user from the Team.
How do users access the course(s)?
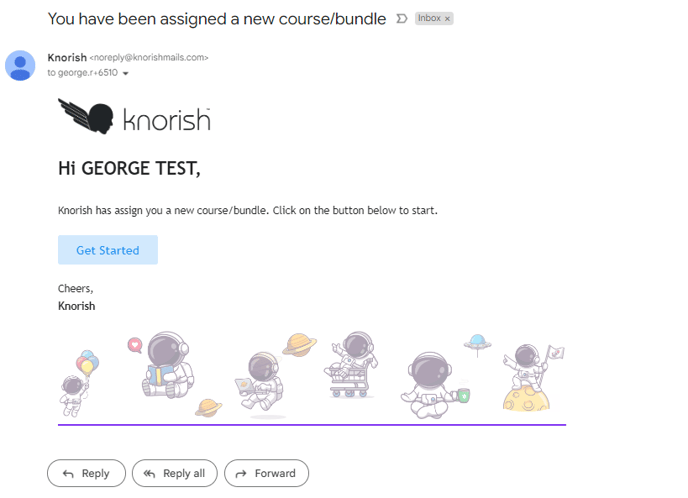
When a user is added or assigned to a team and if you have selected the option "Send assign course/bundle notification (edit template )" the user will receive an invitation email to join your learning platform. The user can then click on the 'Get Started' button to access the content.
- If the user already exists, simply selecting the option - Send assign course/bundle notification will suffice. The user will click on the Get Started button on this email. If they are already logged in, they can continue to access the content, else the platform would ask them to login by entering their login ID and password.
- However, if the user did not have an account earlier, ensure to click on 'Send create password email to new users'. The user clicks on the Get Started button and they will be redirected to the website’s Login page where they first need to create a password. Once the password is created, they can simply click on the Continue button to be redirected to the dashboard.
- If the user does not remember the password, they can click on forgot password on the login page to create a new one.
💡 Important Considerations:
- Upto 5000 users can be imported at a time. A maximum of 10 courses or 10 bundles or 10 teams can be selected in a single add/import user. Users can be added/imported into unpublished and published courses or bundles as well.
- The name and email fields are required for the learners so is the country code for the mobile number whereas the Password is not mandatory.
- The dial code should not contain ‘’+’’.
- Password must have a minimum of 6 characters. If you do not wish to assign a password, leave the column blank.
- User import requests will be processed in the background. You can only run one user import process at a time and will be notified when the process is completed.
- If 5,000 users are imported at a time, this request can take anywhere between 30 minutes to 180 minutes depending upon queue size, number of courses or bundles or teams selected, and email notification selection.
- Selecting 'Send create password email to new users' will only send an email to new users only and not existing users who are being re-imported into another course.
- Checking the box Send assign course/bundle notification will activate notifications to inform users of being assigned a course/bundle.
- The create password link (Get Started button) expires in 10 days or if it is used once (whichever is earlier). If the link has expired, please direct the user to visit the website and click on Forgot password in order to reset it. Or, you can reset their password by following the steps here: https://knowledge.knorish.com/update-user-profile#change. In the future, if the user wishes to access their course/content, please redirect them to visit the website and log in.
- In case you just want to add the users to your website, select Do Not Assign the Course. And the list will still be imported without any course or bundle being assigned to the user.
- Please ensure the accuracy of the information prior to it being uploaded.
- Please make sure there are no extra commas, periods, blank spaces, or other punctuation marks on your sheet. The addition of such characters will cause the .CSV import to display an error message until that error was removed and the sheet is re-imported. Additionally, ensure that you don't have duplicated rows of information contained within your sheet. If there is any error message you see during file upload, please recheck your file for any errors, fix them and re-upload the file.
- If you wish to add/import users in two or more courses, you would need to add/import/notify the same user(s) again and select a different course.
- Learn how to customize email templates here: How to customize an automatic email template?