Customizing your signup options can greatly enhance the user experience and help you collect valuable information from your learners. By adding additional fields and personalizing the signup page, you can tailor the onboarding process to better suit your needs.
Name and Email ID are the default options available at signup for learners. You can now add up to 5 additional fields of your choice in the format of text, number, date, country and checkbox.
Covered in this article
- Access Signup And Login Section
- Changing The Account Pages Background Image
- Adding New Custom Fields For Signup
- Reordering Fields
- Access And Export Custom Signup Fields Data
- Important Considerations
💡 Note: In order to enable one-click passwordless signups for a faster sign-in process, check out Password-less & Express Checkout
Access Signup And Login Section
Here's how to access the Signup And Login section in your Knorish account.
- Log in to your Publisher Account
- Go to Settings > Signup and Login
- Options available here:
- Account pages background image
- Custom signup fields
- Social signup and login
- Parallel login
- Express checkout and passwordless signup
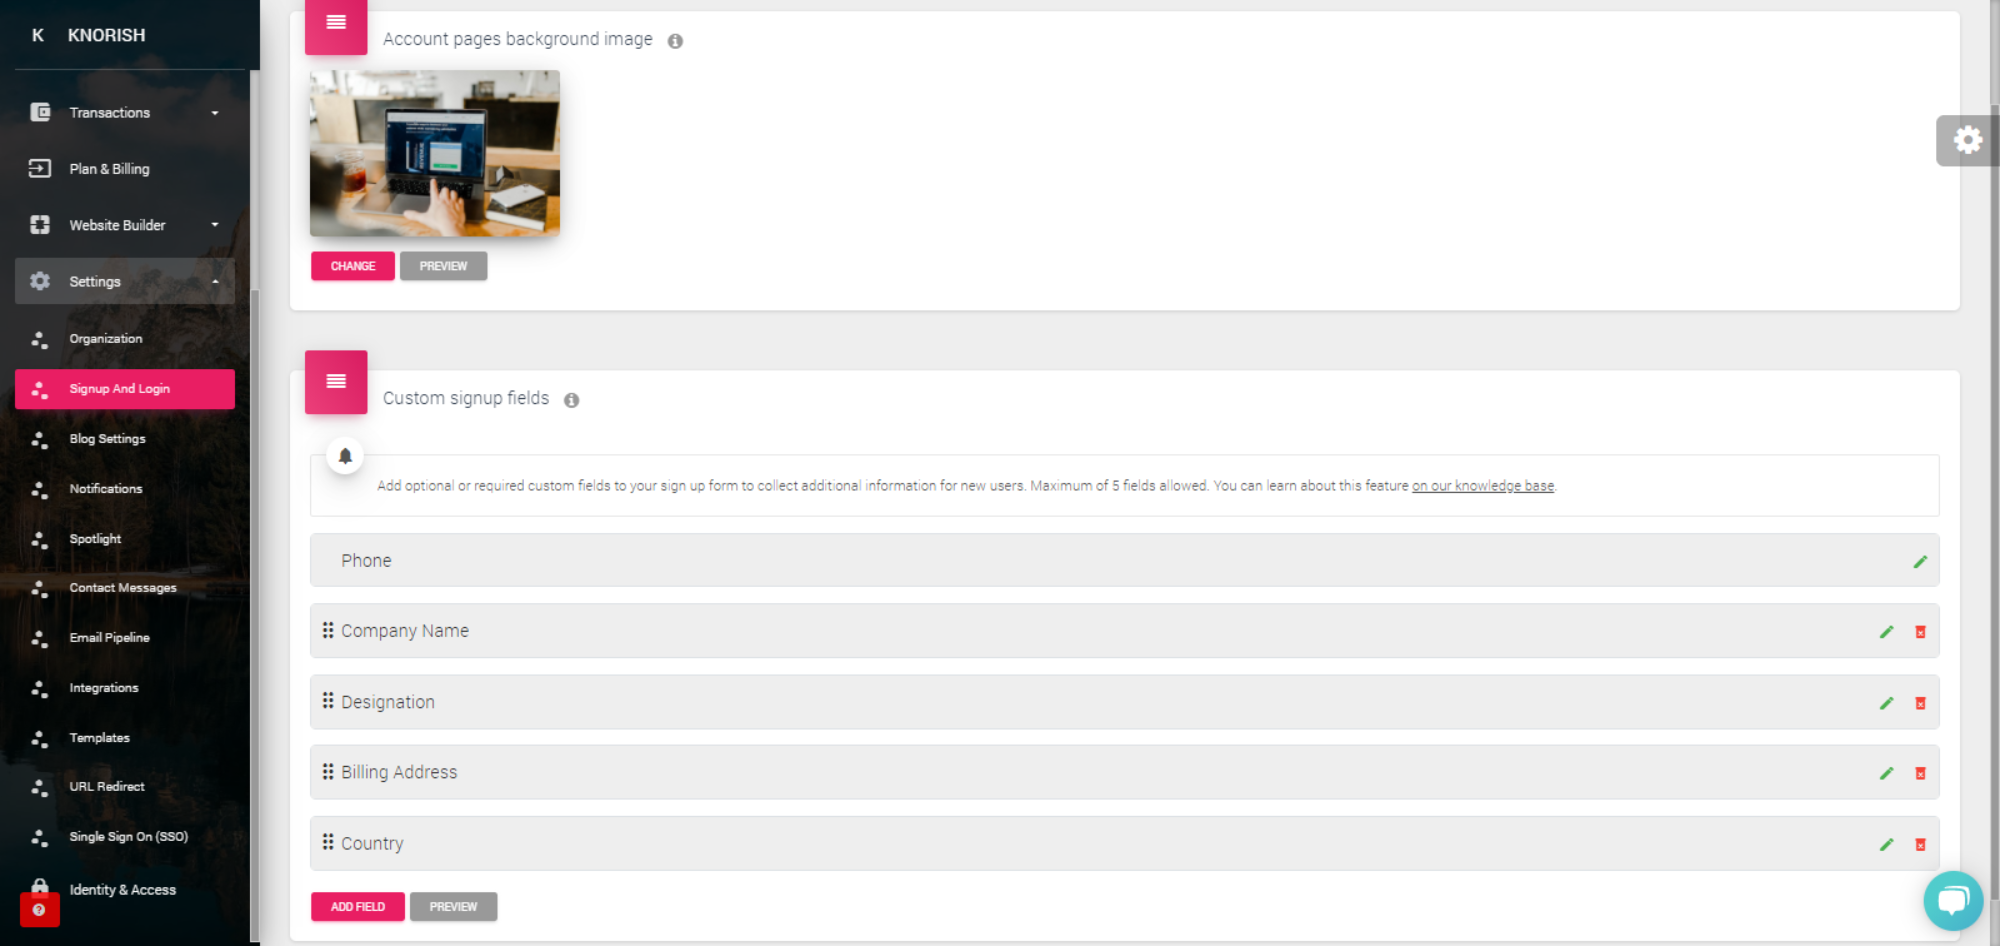
Changing The Account Pages Background Image
Here's how to personalize the look of your signup and login pages by changing the background image.

- Click on Change to upload a new image
- Upload New Image
Adding New Custom Fields For Signup
Follow these steps below to collect more detailed information by adding custom fields to your signup page.
- Under Custom Signup Fields, click on the edit icon to turn the ‘Display Phone Number’ on
- Enter the field text/ value
- Select Preferred Country Code
- Select Make this custom field required to make it mandatory
- Click Add field for more options
- Under Custom field name, input the name of your custom field
- Under Field Type, select Text, Date, Country or Checkbox
- Selecting a country enables a drop-down list of countries for users to choose from
- Add the respective Field text/ value
- To make the custom field mandatory to fill, select 'Make this custom field required'
- Click Save
- Click Preview to preview the additions
Reordering Fields
Here's how to organize your custom fields by reordering them on the signup page.
-1.gif?width=688&name=chrome-capture%20(5)-1.gif)
If you've created your custom fields and now need to change the order in which they display on your signup page, simply drag and drop the fields using the dots on the left of each field and reorder them.
Access And Export Custom Signup Fields Data
You may require to verify the status of the checkbox completion, or access the custom sign fields data for further.
Here's how you can access this data:
- Access Users < All Users
- Scroll down to the users section
- Review the data available in the section
- To access an individual's data, select View next to learner details
- To export the data, select the applicable date range, click select < export
- On the pop up, click on the hyperlink - You can track export here
- Click on the settings icon, select download to download the excel sheet
Important Considerations
- The Image size should not exceed 300KB
- Max 5 additional fields other than Name, Password, and Email can be added to your signup custom form.
- Once the user account is created, details such as Name, email Id and phone number with country code are stored in the user's profile which is accessible under the Users section on the dashboard.
- Consent captured via checkbox is not stored in the user's database.
- Users would be able to change their contact information from their profile section.
- Publishers would be able to export the data of these additional custom fields from the users' section except the checkbox based consent data since that is not stored.
- When you delete any custom field, make sure to backup users’ info, because this action would erase the data (only custom field data).