In this article, we will show you how to set up your blog so that you can start using SEO practices and content marketing to bring organic traffic to your site.
Depending upon which plan you are currently subscribing to, you get the option to create blogs posts/articles on your website complete with Videos, Images, Texts and Links.
Step 1: Activate Blog on your website
To enable the same, access the Dashboard and under the Website Builder, click on blog posts.
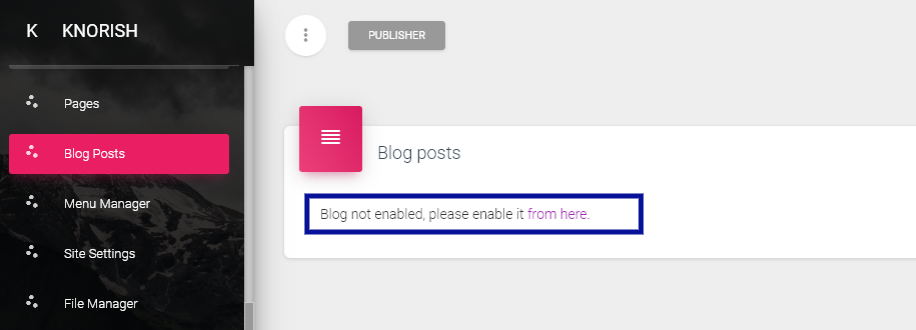
If you are setting up your blog posts for the first time, you would see a screen as shown above. Click on the 'from here' link to access the blog setting page.

Step 2: Complete Blog Details
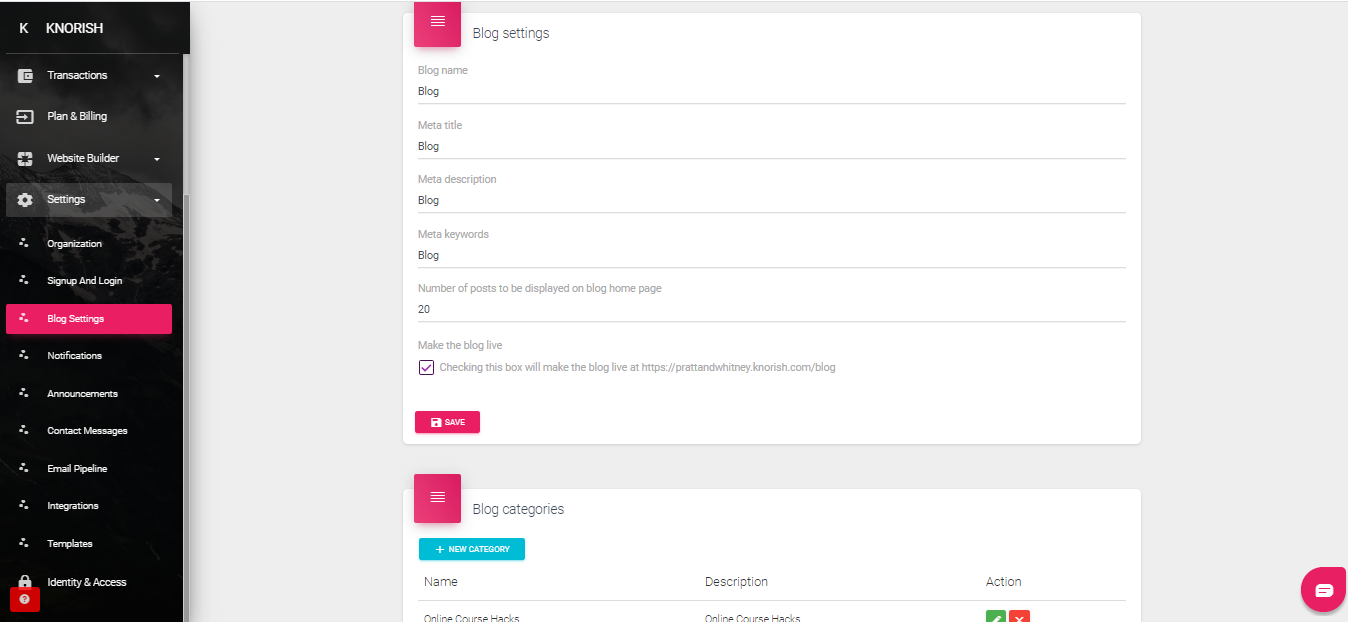
On the blog settings page (available under settings section), Complete the details required:
- Blog Name
The Name of the blog as it should appear on the Menu on your site. - Meta Title
The title for the Blog that you want Google to index it as. - Meta Description
This is the description that shows up under a link on Google Search A description that gives an idea to what the link/blog is all about. - Meta Keywords
Meta keywords are basically words or phrases separated by comma in the HTML source code of a webpage. They describe the content of a website shortly and concisely, and are therefore important indicators of a website's content to search engines. - Number of posts to be displayed on blog home page
A maximum of 99 blog posts can be shown on a blog home page. Depending upon the number of pages you enter, the platform would automatically paginate the other blog posts.
Once done, click on the Radio Button under Make the Blog Live.
Step 2A: Set Up Blog Categories
In case you have blog posts under different categories, you can even create the categories. To create a category, click on 'Enter Category Name' and then the description.
Note: Character Limit
-
- Category Name: Maximum 100 characters
- Category Description: Maximum 200 characters
Step 3: Connect blog on the menu on your site
To take your blog live follow these posts: access Blog Settings under Settings section.
These details have been filled already as part of Step 1. The Radio Button 'Checking this box will make the blog live at:...' should also be ticked already. From this radio button text, copy paste the complete link starting from HTTPS
Then click on Pages under Website Builder and click on New External Link as shown below.
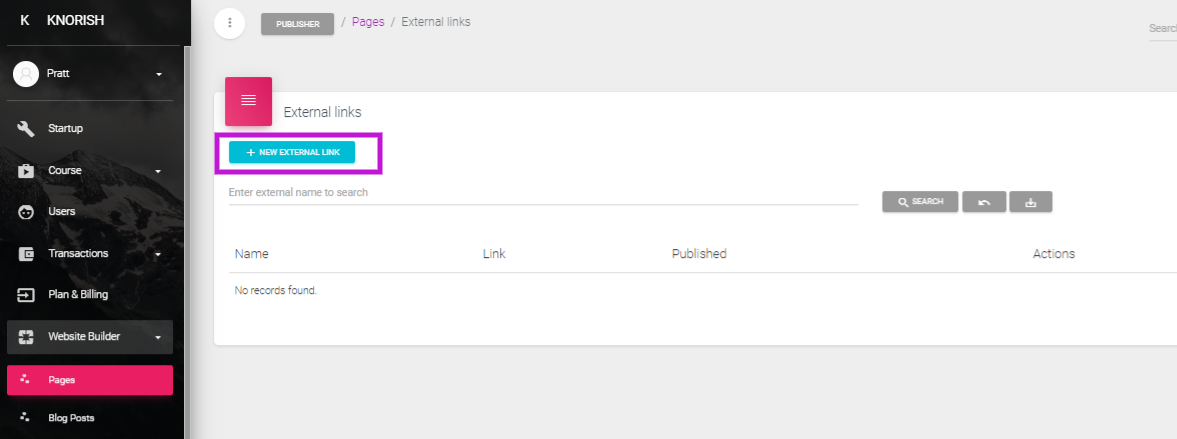
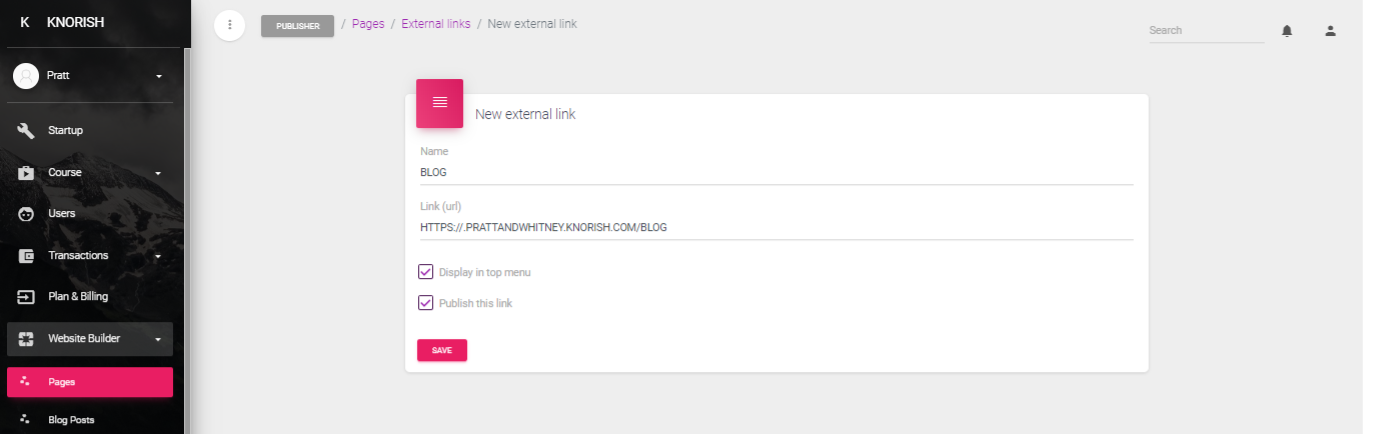
Then type in the blog name and paste the link. Ensure to click on Display on top menu and publish this link and click on save.
Step 4A: Create your first blog post

Once step 1 & 2 are complete, head back to Blog posts under the Website builder and click on New Blog Post to create a new post.
Step 4B: Complete Blog Post Details
On the next screen enter the details of the blog post as required:
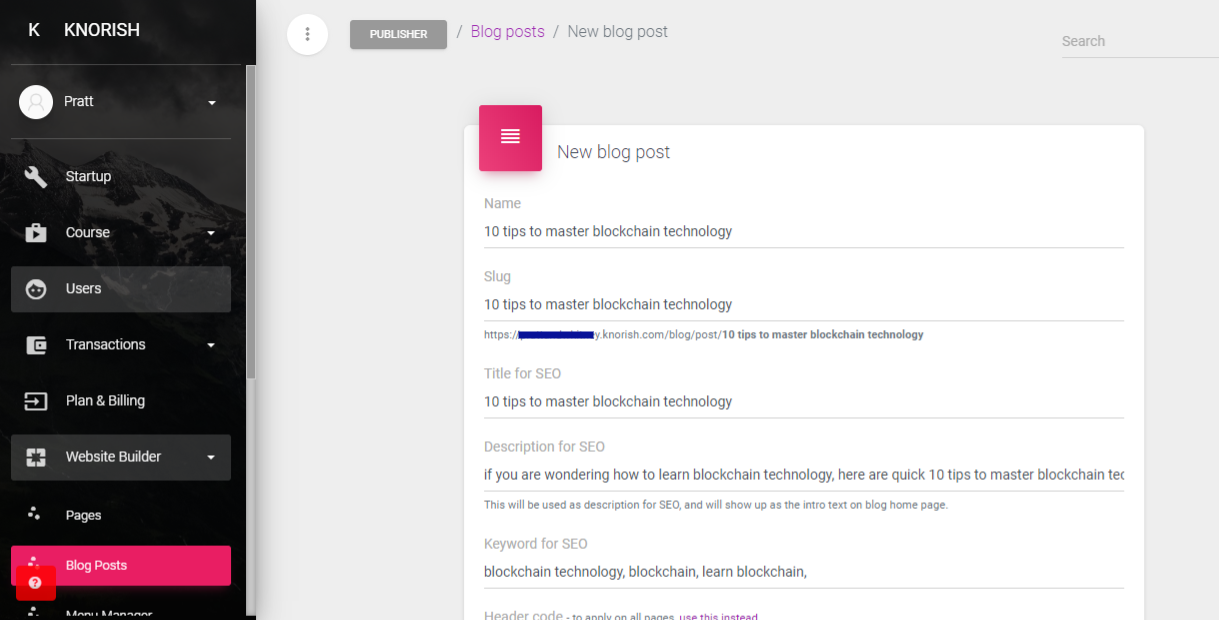
Complete the details in the section above to ensure that the SEO of the post will be done properly. This is an important piece because as your create this piece and more traffic your blog post gets, the post will eventually start ranking high on google search bringing in more traffic organically due to people searching for more information like the one shared in your post.
- Name
The Name of the blog post should ideally contain the keyword you are trying to target. - Slug
is how the link would appear. you can simply copy paste the title of the blog and then remove the unnecessary words. This would form the link of the Blog post.
- Title for SEO
This is how search engines would read the information on the title. - Description for SEO
The meta description is a snippet of up to about 155 characters which summarizes a page's content. Search engines show the meta description in search results mostly when the searched-for phrase is within the description, so optimizing the meta description is crucial for on-page SEO. - Keyword for SEO
SEO keywords are also known as keywords or keyword phrases that are terms added to the online content in order to improve the content's search engine rankings for those terms. - Header & Footer code
Header and Footer code fields are meant for special codes that third party widgets/apps often use. For example, if you're including Google Analytics there will be script code that you paste there.
Step 4C: Choose a blog post theme
Once the details are in, please choose a blog post theme. Each website theme comes with various blog post designs which come as a default when you create a new blog post. Such blog post themes as shown would be to you in case you have selected a website theme while making the website.
Once the theme is selected, click on Save & Next.
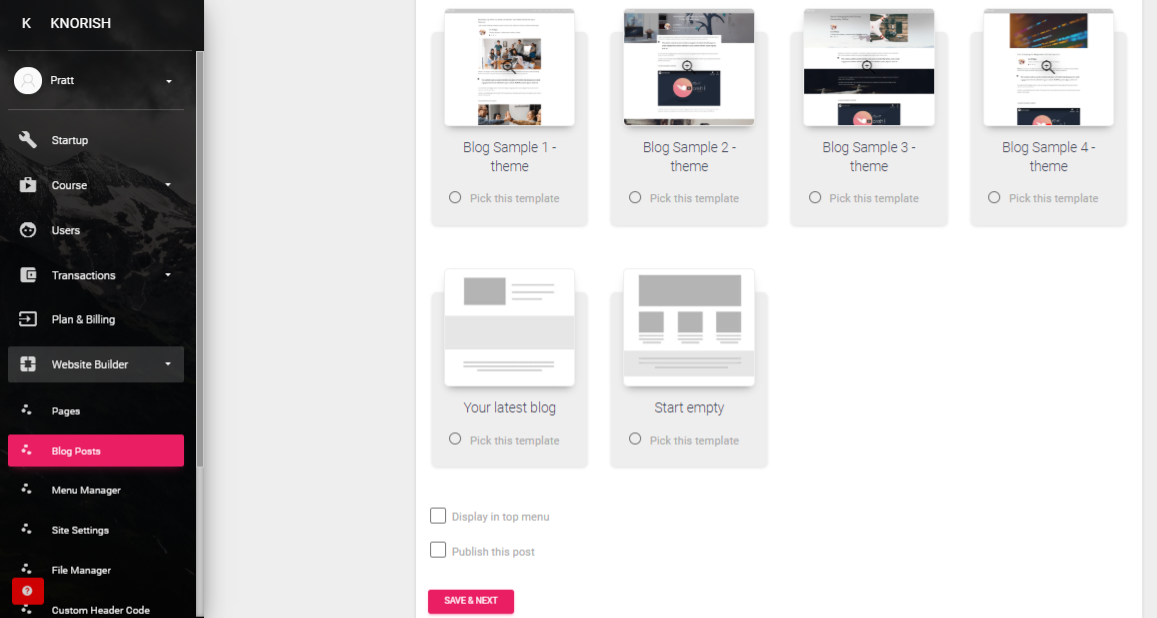
NOTE: Do not click on 'Display in Top Menu'. Since you want the posts to be part of the blog, simply click on save & next and start building the blog. Once done, you can then click on Publish this post to have the post published in your blog.
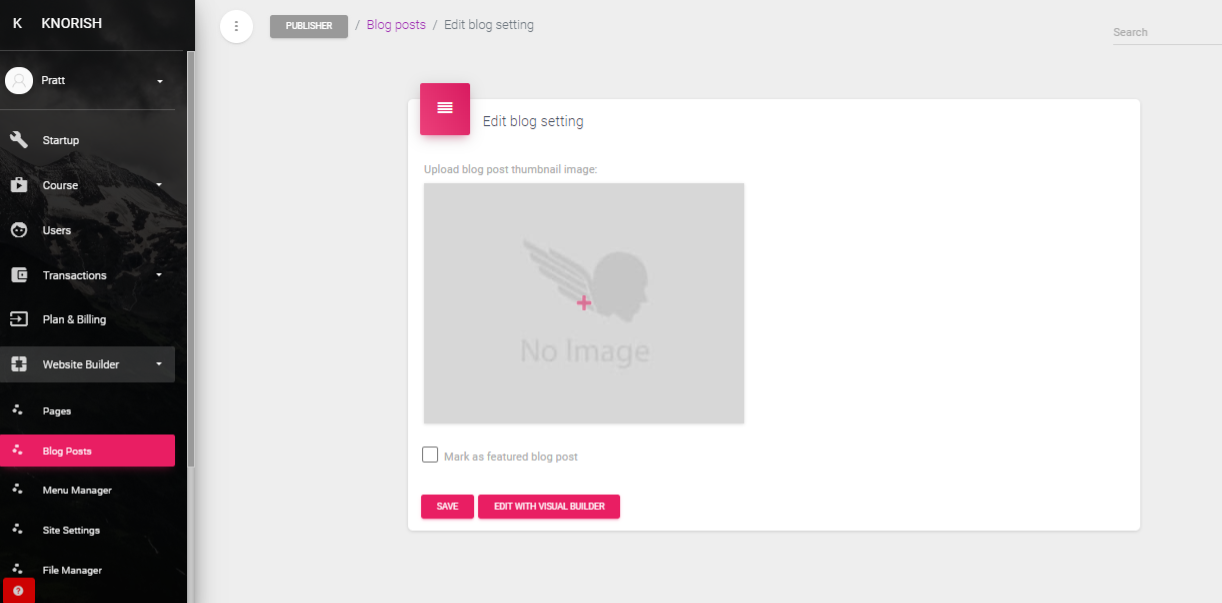
Step 4D: Upload Thumbnail and Featured Images
On the next screen you can add a thumbnail image and even mark the post as a featured image.
NOTE: Thumbnail Image should be a square image to ensure proper visibility

When you select the post as Mark as Featured Post, a new section opens. Here please upload the featured image.
Featured posts are ones that will reflect on the top of all other posts. So use this feature for only those really high value posts that you want highlighted. 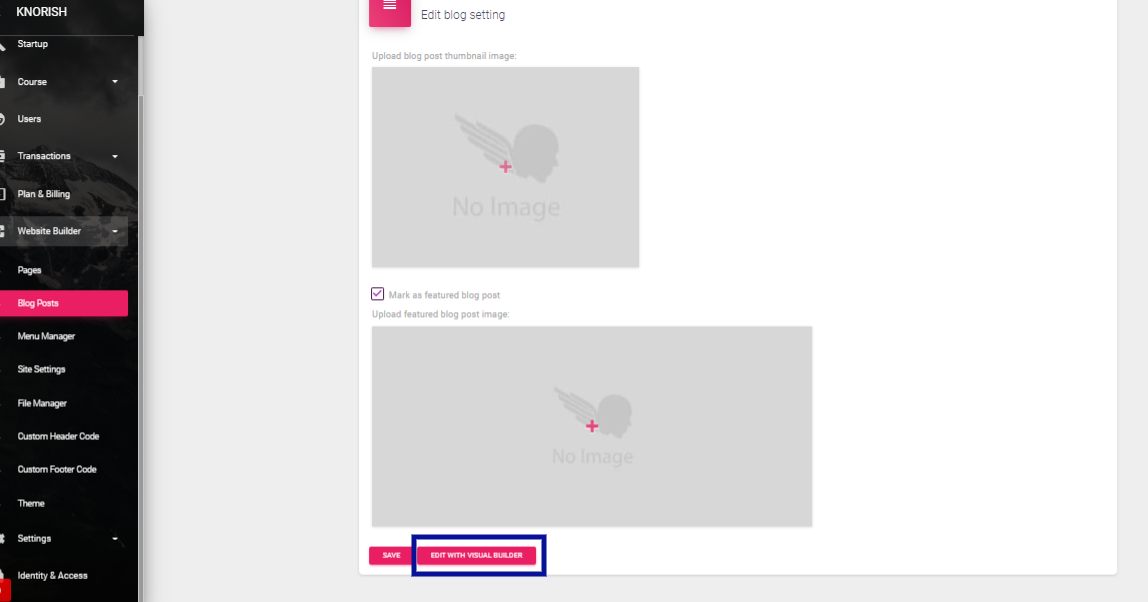
NOTE: The featured Image should be a rectangular image as seen above to ensure proper visibility on the featured post.
Once done, click on Edit with Visual Builder to start creating your first post.
Step 4E: Creating the Post
Creating a post is the same as editing a page on Knorish. With super simple select and change text, and easy to modify page options, you can create your post in no time.
NOTE: To read in detail how to edit a page, read more here: How to customize website pages on Knorish
User's View
Once you have built a few posts and a few featured posts, this is how your blog page would look like!