With Zoom at Knorish, you can now set up and conduct live meetings or webinars as single, multiple, and ongoing sessions right from your Knorish site.
In this detailed article, we’ll share various aspects of the live sessions starting with its introduction, how this feature works, its setup, recording, connecting or disconnecting options, and FAQs, etc.
Live Sessions
- Managing Your Live Sessions
-
-
- Creating or Editing Course Landing Page For Live Sessions
- Check scheduled live sessions
- Go live from your Publisher/Instructor dashboard
- Student Experience
- Recording, Retrieving & Uploading Live Session Videos For Replays
- Cancel or Edit a Live Session
- Notifying students about upcoming sessions, changes or cancellations
- Create a Co-host
- Breakout Room Feature
- Waiting Room Feature
- Spotlighting Participant’s Video
- Whiteboard Feature
-
- Frequently Asked Questions (FAQs)
Important Notes:
- Zoom meetings have a limit of 300 attendees and zoom webinars have a limit of 500 attendees.
- Both meetings and webinars can be set up per live session for a maximum of 30 hours. After a meeting or a webinar is set up, in case the live Zoom session extends beyond the pre-set time, then a 10 mins buffer is given for the session (meeting and webinar) to end. Post the 10 mins buffer, the Zoom session will stop automatically.
- If the host happens to LEAVE the meeting/ webinar (due to internet connectivity or issues) - the host can join back by clicking on the go live button in the publisher dashboard, else zoom will stop this meeting/webinar automatically after 45 mins the host has left.
- If the the admin, host or co-host click on END button on Zoom, the session would end and the Zoom meetings or webinars can't be restarted with the same joining URL.
- To join a Zoom meeting or webinar from Mac or iPhone, you will need to enable popups.
Mac Screenshot.png?width=378&name=image%20(3).png)
iPhone screenshot.png?width=173&name=image%20(4).png)
- If the Poll feature is not working on your Mac, please follow these troubleshooting steps:
- Update Zoom on the Mac app (the older version may not support it)
- Logout from the local Zoom app
About Live Sessions
Live Sessions with Zoom lets you share your knowledge with your audience with even more engagement. You can now conduct live sessions and automate the entire logistics of planning live sessions, reminders, payment collection, managing learners, and more straight from within your Knorish site. Plus, you also get all the super cool features of Zoom without the need to get a separate subscription for Zoom.
You can host live sessions, offer live coaching or consulting, conduct live online training, and offer one-on-one sessions or webinars with this feature once you schedule the start date, time, and duration.
The learners can participate in the live sessions right from within your course!
Live Sessions and Webinars?
Live Sessions on your Knorish site are pre-integrated directly with Zoom. You can choose to create live sessions (single, multiple, or ongoing) in your course or set up Webinars as well! The Zoom integration allows for up to 300 meeting participants and 500 webinar participants in one live session.
Here are a few key differences between a live session and a webinar:
-
- Live Sessions are designed for more interactive smaller group sessions. These are designed to be collaborative sessions with all participants being able to screen share, turn on their video and audio, and view who else is in attendance.
- Webinars are an additional feature with Zoom that allows you to conduct sessions ideal for a large audience. The feature has been designed specifically to help hosts conduct the session better with features that address this specific need. Besides the standard video, audio, and screen sharing, webinars allow view-only access to attendees who can interact with the host and other designated panelists via chat and answer polls and quizzes as well. The host or admin can unmute the attendees if they choose to.
Note: To learn more about the functionalities available, visit: https://zoom.us/pricing/webinar
To use this feature, you must have a Knorish paid plan to get started. After which, you can create unlimited Live Sessions. Simply set the date, time, and duration for your Zoom Session or Webinar directly within your Live Session course setting. The live schedule will be visible to students directly within their dashboard and once the live session starts, students can simply click on the join link to attend.
How to create a live session?
This is how you set up a live session!
- Go to your Dashboard > Courses > Create a new course > Enter a Course name
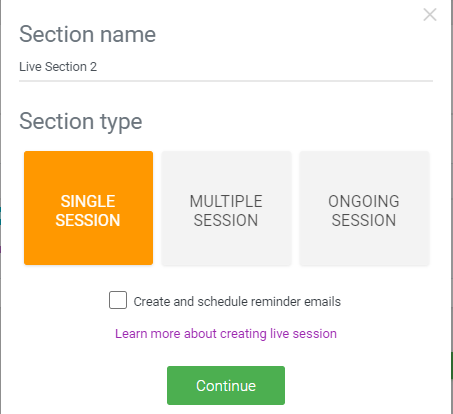
- Click on Add Live section > Under section type, choose your format type:
- Single Session: It is a one-time session.
- Multiple Session: Schedule multiple sessions at any date and time or daily sessions.
- Ongoing Session: Schedule sessions based on the frequency of the sessions whether it is on a weekly, monthly or yearly basis.
- Select ‘’Create and schedule reminder emails’’ if you want to schedule an automated reminder email 1 hour before the scheduled start time of the session.
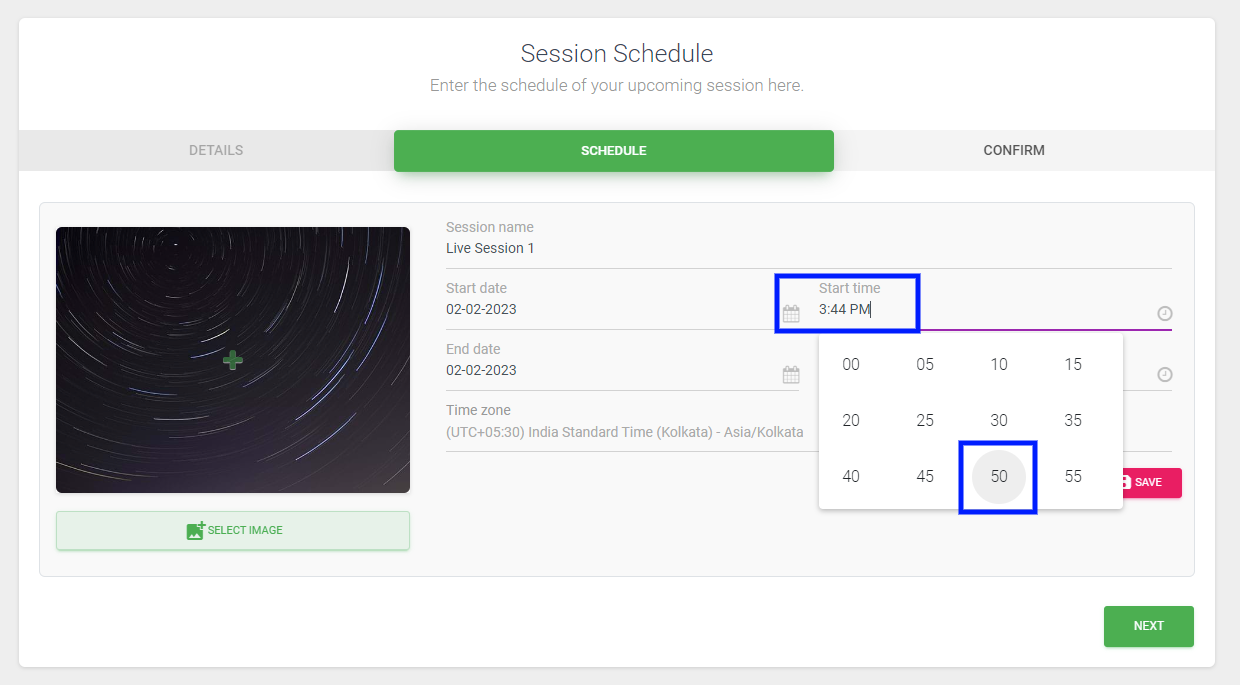
- Fill in the details such as Session name, start & end date & time, time zone, and the live session thumbnail.
💡 Important Note: The minimum duration of any live session (Single, multiple or ongoing) should be more than 30 mins.
You can setup up to 3 email reminders per live session (meeting or webinar)
How To Create And Start A Live Session Immediately?
In case you wish to go live immediately, you can set up one that starts 5 mins later. The live session would be added to the list of upcoming sessions under Startup. Once set up, you will be able to go live immediately without waiting.
Here's how you can do it:
- Go to your Dashboard > Courses > Create a new course > Enter a Course name
- Click on Add Live section > Under section type, select Single Session.
- Fill in the details such as the Session name and the live session thumbnail.
- Select the Go Live time for the session after 5 minutes
- Click Save and press Next.
- Click on Startup on the menu.
- Select Meeting/ Webinar.
- Press Go Live
💡 Important Note:
- While setting up a new live session, in case you select 'Create and schedule reminder emails' will send the emails instantly to all participants.
- To go live immediately, the session needs to be set up to start after 5 minutes. once set, you can click go live and start the session instantly.
Creating or Editing Course Landing Page
Scenario 1: Once done with the above settings, you’ll be taken to the Install a Theme page:

Scenario 2: If the theme is already installed, the page will ask for choosing a landing page. So, go ahead and choose a page from the installed theme and the page's design gets copied.
Check or Review scheduled live sessions
- Course Curriculum Section on the landing page

- Live Sessions Library
You can search for the session using the search option.
How to go live from your Publisher/Instructor dashboard?
All your ongoing and upcoming Live Sessions are visible to you in the Live Session Library while the past sessions will be visible on the course curriculum page.
To run the Zoom live session for the users in the Zoom window, the below check box can be selected. Else the zoom live session for the users shall run in the user dashboard window. Follow these steps:
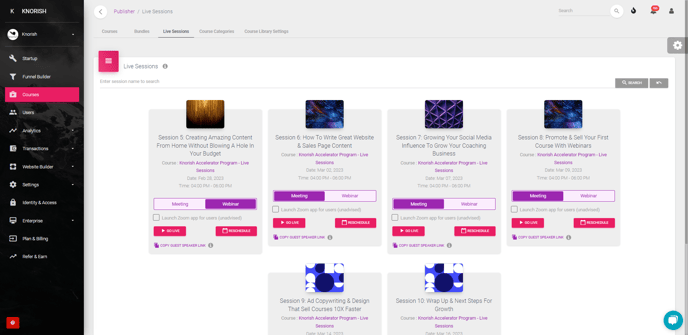
- Click on Live Sessions on the dashboard
- Enter the session name to Search
- Select the mode of the session: Meeting Or Webinar
- Click On 'Go Live' to start the Zoom session or 'Reschedule' to change the date and time.
Note:
- A session can be started up to 10 mins before the scheduled time.
- Selecting the checkbox 'Launch Zoom App for users' is not advised as the users would be able to share the Zoom live session link with others.
How to Create a Co-host in the Zoom Live Sessions?
Creating a co-host in the live sessions lets the co-host manage the administrative end of the event like managing participants or handling recordings.
Note: Only the Host can assign a Co-host role. You can have as many Co-hosts as you want in your webinar or meeting.

Follow these steps :
- Click on Participants in the meeting controls at the bottom of the Zoom window
- Hover the cursor over the participant name you wish to be a co-host
- Choose More & click on Make Co-Host
Options available for a co-host

As a Co-host, the following functionalities are available during the Zoom Live Sessions
- Chat: lets you access the chat window to chat with the participants
- Stop Video: allows start or stop video
- Spotlight Video: puts up to 9 participants as the primary active speakers for all participants and participants will only see those speakers
- Rename: will let you change a participant's name as to how it is displayed to other participants
- Put in Waiting Room: Co-hosts can place participants in the waiting room
- Remove: Or they can admit/remove participants from the waiting room
Accessing Breakout Room Feature
The Breakout Room Feature has been enabled in live sessions when selected as Meetings. Click on More to create Breakout Rooms for your session.
How to enable a waiting room in the live session?

The Waiting Room option enabled will let everyone or particular participants wait before you let them or all admitted to the session.
- Create a Live Event and Start Meeting
- Go to Security Settings
- Toggle to enable the waiting room
Spotlighting Participant’s Video
In this feature, up to 9 participants can be pinned by the host or co-host as the primary active speakers for all participants, and participants will only see these speakers.
Here’s how you can spotlight a participant’s video in an Android in steps:
- Tap on the participants
- Select the participant’s name
- Tap on Spotlight Video
Note: Just in case you want to cancel the spotlight, you have to repeat the first two steps but in the 3rd step you will tap on “ Cancel Spotlight Video”.
Whiteboard Feature
Zoom Whiteboard lets you collaborate whenever and wherever you want. You can share your online whiteboards to collaborate with anyone with a Zoom account.
- To share a whiteboard, click Share Screen located in your meeting toolbar.
- Select Whiteboard
- Click Share
- When you are done, click Stop Share.
The annotation tools will appear automatically, but you can press the Whiteboard option in the meeting controls to show and hide them. Use the page controls in the bottom-right corner of the whiteboard to create new pages and switch between pages..png?width=640&height=68&name=image%20(18).png)
Note: Only the participant or host who started sharing the whiteboard has access to create and switch pages.
Student Experience
- To join a Live session from within the Course delivery screen, a student will simply need to select the Join Live Session button from his course page or calendar invite.
- In case the session has not yet started, the student will be brought to a page indicating the session has not started yet.
- Learn more about the student live session login experience here: Live Sessions: Student Login Experience
Recording, Retrieving & Uploading Live Session Videos For Replays
Enabling Auto Recording On All Your Live Zoom Sessions
Note: This Feature Is Only Available For Professional and Power plan users. Please contact Support or access your dashboard to upgrade your account
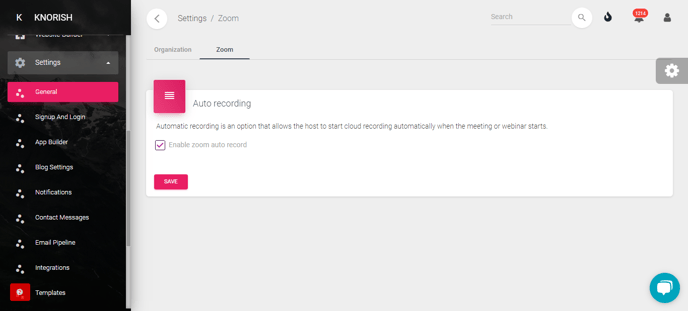
Enabling automatic cloud recording for all your Zoom meetings and webinars needs just one click. Please follow these steps to enable it on your account:
- Navigate to the dashboard.
- Click on "Settings."
- Within the General tab, locate and select "Zoom."
- Activate the checkbox labeled "Enable Zoom Auto Record."
- Save your changes.
By completing these steps, you will have successfully configured the setting to auto-record Zoom meetings on the cloud.
Important Consideration: Once activated, you will not be required to start recording manually. This will start auto-recording all your Zoom sessions, from the moment you go live in the session.
Manual Recordings

You can opt to manually record your Live Zoom sessions locally on your computer or on the cloud. If you want your students to have access to the previously recorded sessions, you can upload your recorded Zoom session videos to a Live Event or include a session replay link. Recording the live session is a Zoom feature.
⚠️IMPORTANT NOTE: Do not delete the live session from the dashboard. Please ensure to save the recording prior to deleting the live session.
How to retrieve the cloud recording from the admin dashboard?
Here are the steps:
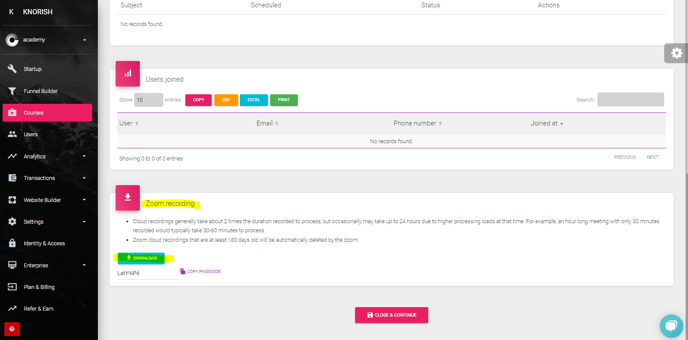 Go to the Dashboard
- Click on Courses
- Click on the specific course's builder (spanner) icon in which the live session exists
- Edit Session Settings
- Scroll down and download the cloud recording
Enable Recordings As Replays
Once the recording has been saved on your system, delete the live session chapter.

- Create a new chapter with the name of the session and upload the recording.
- Click on 'Preview Course' to check if the video is encoded and available for replay.
- Once the video is ready, the link can be shared for replay watching.
Note:
- Cloud recordings generally take about 2 times the duration recorded to process, but occasionally may take up to 24 hours due to higher processing loads at that time. For example, an hour-long meeting with only 30 minutes recorded would typically take 30-60 minutes to process.
- Past recordings will be available for a maximum of 10 days. Session recordings beyond 10 days can be automatically purged by the platform based on the variable availability of storage space attached to your account.
- DO NOT DELETE the live session from your account before retrieving the cloud recording. In case, the live session is deleted, the recording will also be deleted.
- Zoom allows the recording of different views in the meeting/webinar. And that's why two video files are generated when you download the recording. Refer to Zoom documentation for more information https://support.zoom.us/hc/en-us/articles/360025561091-Recording-layouts.
-
If you've recorded the meeting into different sections or stopped and started a recording in a session, Zoom will create multiple files for that recording. To access it click on the { |> } icon in the bottom left corner to see all the parts. Then, just tap the download button in the top right corner to save the session recordings. Look at the picture below for a clearer idea.


How To Upload Your Recordings
How to Cancel or Edit a Live Session?
If you need to cancel a particular Live Zoom Session or Webinar, you must notify the attendees first and delete the session within the curriculum. If instead the rescheduling is required, you can edit the live session from the Curriculum section by clicking on Edit Live Section.

Deleting your Live Session in Knorish will automatically cancel your Live Zoom session. Here’s how it works:
Note: Any individual chapter can be deleted, however, a section would need you to delete the chapters in it before deletion. You can read more detailed instructions here at: https://knowledge.knorish.com/enable-automatic-course-curriculum-updates-on-course-pages
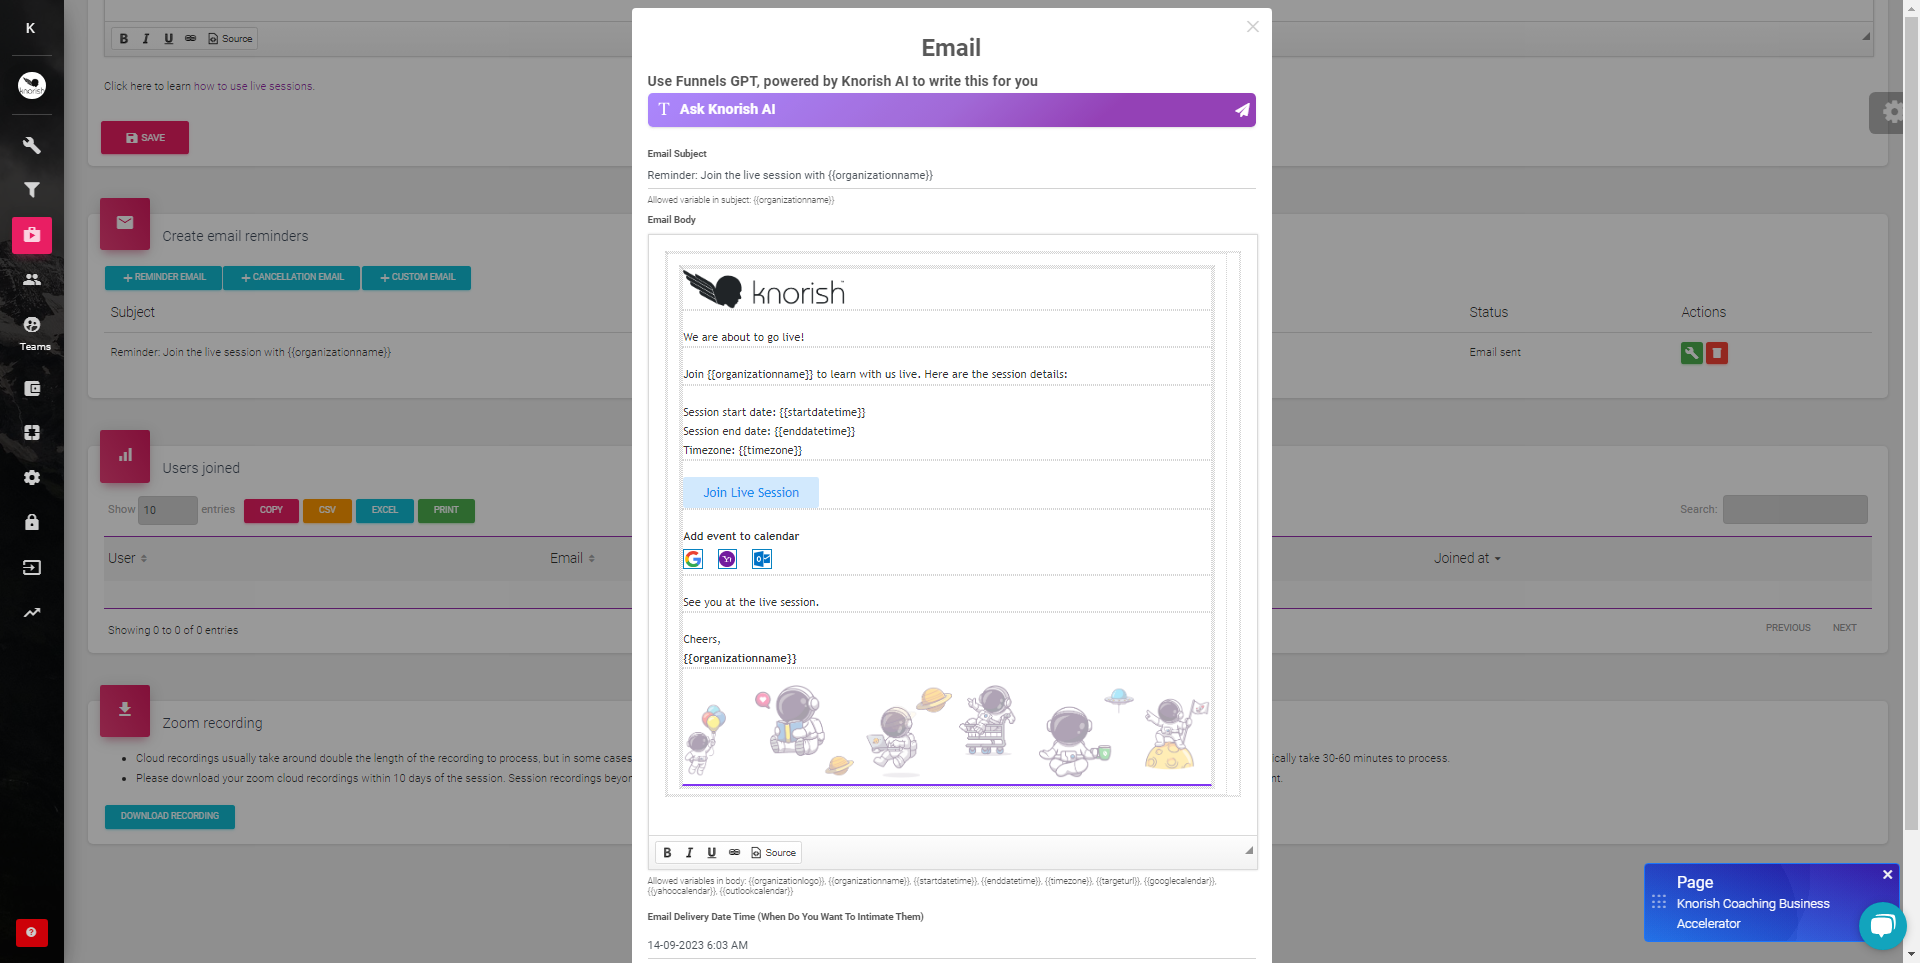
Notifying students about upcoming sessions, changes or cancellations
By default, the student will be sent an Event Reminder one hour before the Live Session starts. You can customize the emailers further.
Note: You can setup up to 3 email reminders per live session
- In the Curriculum section, go to Course>Courses

- Click on Edit Live Session in Chapter
- Scroll down to Create Email Reminders section

- You can customize your email as desired by selecting the tool icon under Actions.
- Alternatively, you can create email Reminders: Reminder Email, Cancellation or Custom Email.
You have just successfully created a live session reminder that shall be delivered to your set mailing list.
Frequently Asked Questions (FAQs)
- How to download attendees' data?
Learn more here: How to download the Zoom live event or webinar attendees' list with their email & phone numbers?
Zoom Related FAQs
- Conducting Polls: Polling for webinars | Polling for Meetings
- Recording Zoom Sessions
Local recording is available to users. Here's how: Local recording - Sharing your screen, content, or second camera
How to share your screen - Annotations
Meeting participants can annotate on a shared screen as a viewer or the one that started sharing your screen. Learn more - Audio/ Video Issues
- Audio Echo In A Meeting
If you hear an audio echo or audio feedback during your meeting, learn more here on how to troubleshoot it: Learn more - Audio not working on iOS or Android
Try these troubleshooting steps: Link - The video/camera not working
Troubleshooting Tips: Link
- Audio Echo In A Meeting
Live Sessions on Knorish-related FAQs
- What are Knorish’s Live Session requirements?
All paid accounts will have the Live Session feature enabled on their dashboard at no extra cost. Learn more about the pricing plans here - Can I create Multiple Live Sessions in my course? What happens when I create multiple live sessions in my course?
Yes, when you click on Add a Live Section in Curriculum, you will be asked to determine the Section type as follows:
Input the name of your Training Session in the Section name, this will display in the Course Player. While in Section Type, you have to opt to choose your format type amongst:
- Single Session: One session that can be repeated at the same date and time weekly, monthly and yearly.
- Multiple Session: Schedule multiple sessions at any date and time.
- Ongoing Session: Schedule a session on your days and times of a week and repeat it weekly, or you can select dates of a month and repeat them monthly and yearly.
Depending upon your selection, you’ll have to fill in further settings later.
- How to download the list of people who joined your Zoom live event or webinar with their email & phone numbers?
For the users who join the session, their information will be available under the live session section. Here’s how you can download the list of people who joined your Zoom live event or webinar with their email & phone numbers. Click here for instructions.
Important Considerations

You can select to see 10, 25, 50, or 100 entries. The report can be copied on the clipboard, downloaded as a CSV/ Excel form, or Printed.
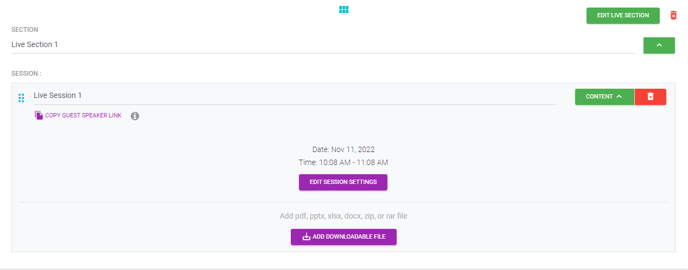
- How to copy Zoom Join Links for Speakers & Users from Your Live Sessions?
Once you have set up a Zoom live Session or Webinar, the guest speaker joining link will be generated. You can easily copy the link to pass it on to the participants. The users joining with the link will be able to directly join once the event begins.
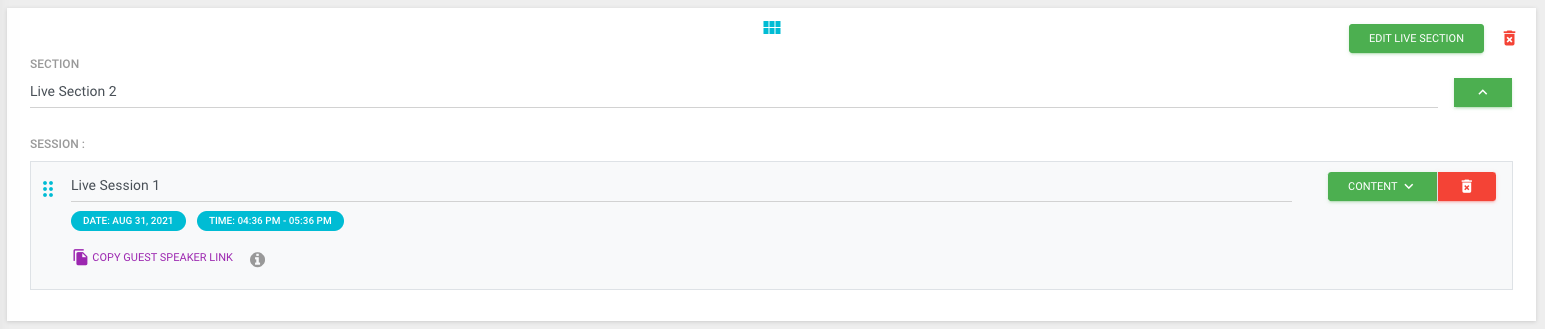
Note: Copy the guest speaker link (will be available all the time, login is not required to join)

Note: Guest speakers will be available everywhere on the live session card, plus on the course curriculum.


- Are email reminders sent to students before a live session starts?
Yes, while adding a live section, you will be prompted to create and schedule email reminders that are set to be sent to students one hour before a live session starts.
You can also create additional reminder emailers while you set up auto-reminders for the learners. To do so go to the curriculum page of the course > content > edit session settings > under Create email reminders, click on +Reminder email (there the sample email is already available, you just need to set up the scheduled email delivery date and time)

- Can I host a larger virtual session using live sessions?
Currently, the platform offers a limit of 300 meeting attendees and 500 webinar attendees. Should you need to host a larger session or event, you may integrate your own zoom license into the platform and host the session. Learn more about Zoom Integration (Bring Your Account) - Can I conduct multiple concurrent sessions?
Currently, 1 Concurrent Live session is possible on the Power plan only. However, yes! If you need access to more concurrent ( simultaneous) live sessions beyond what your current plan offers, please contact our Support Team here and we will be happy to help.
Here is a list of a few more FAQs that will help you give your users a great live learning experience:
- How does a student experience the live session feature and participate in the sessions hosted on my site?
- How to cancel or reschedule a live session and notify learners?
- How to create & promote Webinars at your Knorish site?
- How to enable Zoom live sessions recordings as replays
- How can I conduct one-on-one sessions with Knorish allowing my users to book slots?